Best Crispy Dosa Recipe: How to Make Restaurant-Style Dosa at Home
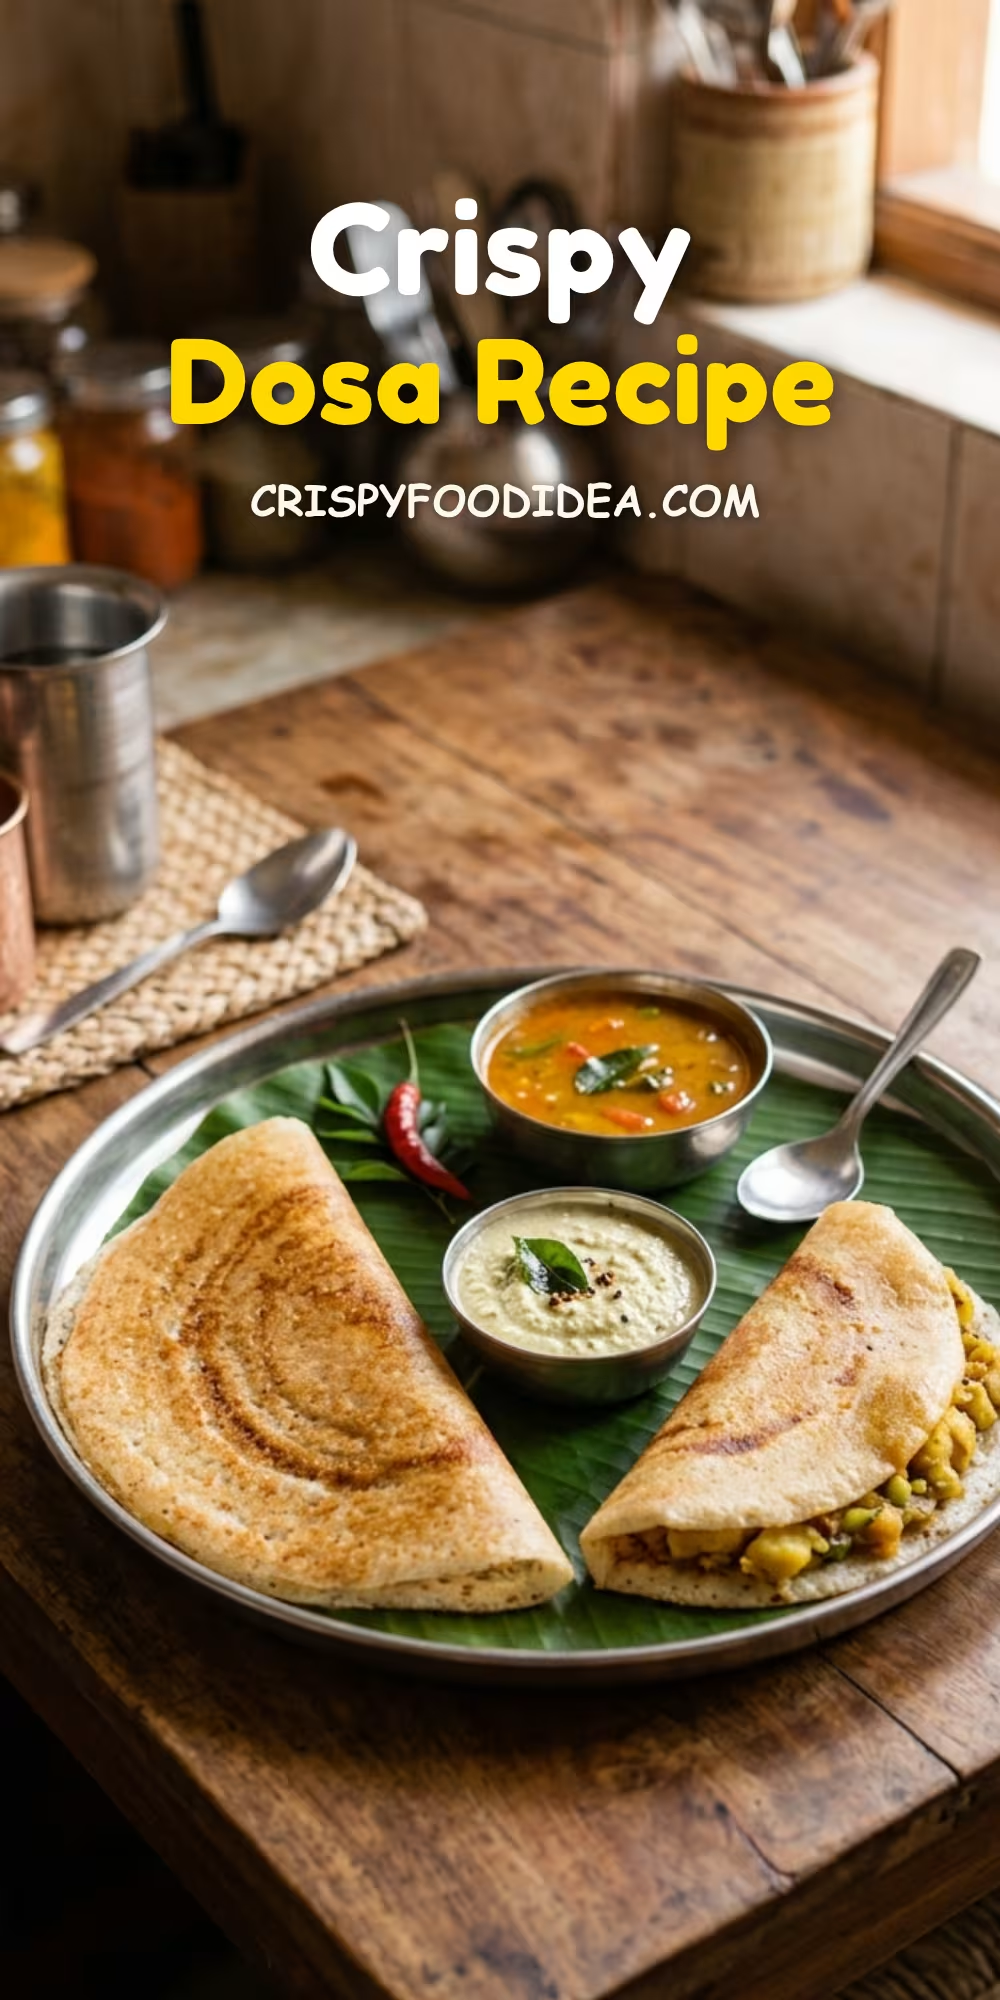
You will notice that whenever we order dosa only in South Indian restaurants, they are quite thin and crispy, but homemade dosa is comparatively less crispy and thick. There is something special about the restaurant crispy dosa recipe that is surprisingly difficult to make exactly at home. The best dosa are paper thin, golden on the edges, lightly crispy on the bottom and light enough not to break when folded.
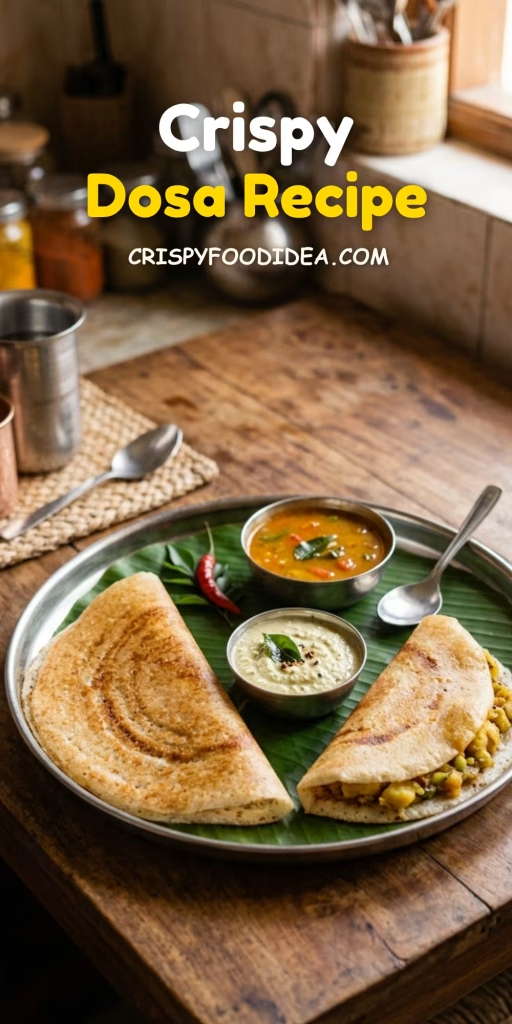
If your homemade dosa is thick, pale, soft, or sticks to the pan, you might immediately blame the batter. But after making dosa at home hundreds of times, I’ve found that the batter is really only part of the equation. Your pan, its temperature, seasoning, and the way you spread the batter—these can make a huge difference.
It’s important to note that a properly heated and well-seasoned cast-iron dosa pan retains heat much better than a lighter pan. This steady heat helps spread the batter thinly and gives the bottom of the dosa enough time to develop those crispy, golden edges we usually associate with South Indian restaurants. This is the main secret for a crispy dosa recipe.
Related: Healthy Indian Meals
Restaurant-Style Crispy Dosa Recipe
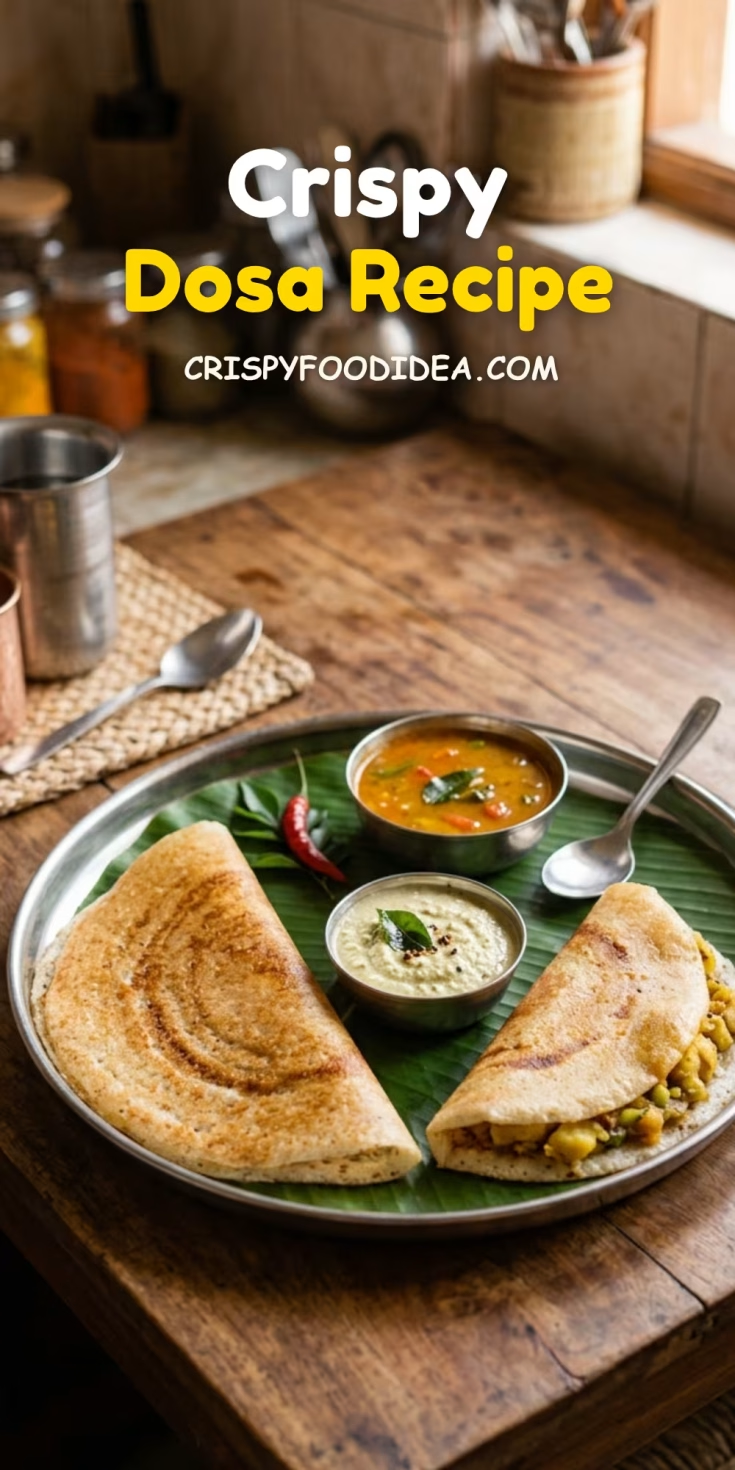
Making the perfect South Indian style crispy dosa in your home kitchen is very easy. At least it's much easier than you think because I have made it hundreds of times myself. With the right amount of ingredients and the right pan, you will get the perfect dosa, which will be light, thin, and crispy, just like the ones you get in a restaurant.
Ingredients
- 1 cup idli rice (or any grain parboiled rice)
- 1/4 cup urad dal (split black gram, skinned)
- 1/4 tsp fenugreek seeds
- Salt to taste
- Water as needed
- Oil or ghee for cooking
Instructions
Making Batter
- Soak the rice. Fenugreek seeds together. Soak the urad dal separately. Do this for 4 to 6 hours.
- Drain both. Grind the urad dal first into a fluffy batter using cold water. Then grind the rice coarser.
- Mix both batters. Add salt. Stir well. The batter should be thick but pourable. Like cream.
- Let it ferment in a place for 8 to 12 hours or overnight. It should rise slightly. Have small bubbles.
Cooking
- Heat your tawa on high until a drop of water sizzles and disappears instantly.
- Lower the heat a little. Pour a ladle of batter in the center. Spread it outward in a motion using the back of the ladle. The the better. That’s how you get crisp.
- Drizzle an oil or ghee around the edges.
- Let it cook undisturbed. Don’t flip early. A heated pan will crisp the base and lift the edges on its own. This usually takes 2 to 3 minutes.
- Fold it. Serve hot with sambar and coconut chutney.
Notes
- A well-fermented batter is important for good dosa texture and flavor.
- Batter that is too thick can produce a heavier dosa, so adjust it gradually with water before cooking.
- If the tawa becomes excessively hot, reduce the heat briefly before spreading the next dosa.
- A properly seasoned cast-iron tawa can provide excellent heat retention and a naturally seasoned cooking surface.
- Avoid disturbing the dosa too early. Allow the base to become crisp before trying to release it.
- Use only a light amount of oil between dosas. Excess oil can make it harder to spread the batter evenly.
Nutrition Information:
Yield:
12Serving Size:
1Amount Per Serving: Calories: 32Total Fat: 0gSaturated Fat: 0gUnsaturated Fat: 0gSodium: 11mgCarbohydrates: 7gFiber: 0gSugar: 0gProtein: 1g
Related: Sweet Pongal recipe
Why Isn’t My Homemade Dosa Crispy?
When dosa turns out soft, thick, pale, or difficult to spread, the problem isn’t always the recipe. A few small details—from fermentation to tawa temperature—can completely change the final texture.
In my opinion, the biggest mistake is to look for a single secret because a fluffy dosa is the result of a combination of several things: properly kneaded batter, correct thickness, a well-heated tawa, controlled heat, and a thin and even spreading technique. Getting just one of these right can help, but to get the best texture, you usually need to get the whole process right.
Your Dosa Batter Isn’t Properly Fermented
The fermentation process affects the texture, taste, and spreadability of the dosa batter. Insufficient fermentation can result in dosa that is heavy, less fluffy, and lacks the desired crunch.
Your Batter Is Too Thick
It is difficult to spread thick batter into a thin layer. If the dosa is too thick in the center, it will usually take longer to cook and may remain soft instead of crispy.
The Tawa Isn’t at the Right Temperature
A cold pan can cause the batter to stick and cook unevenly. An overly hot pan can cause the batter to curdle before it has had enough time to spread. Finding the right temperature is part of the trick.
You’re Not Spreading the Batter Thin Enough
Spreading thinly is one of the keys to crispy dosa. Start in the center and use the back of the ladle to work outwards in gentle circular motions so that you don’t tear the batter.
You’re Adding Too Much Oil
You don’t need to add a lot of oil to make dosa. Usually, a light drizzle of oil around the edges is enough. Adding too much oil makes it difficult to control the cooking surface and can also prevent it from browning evenly.
You’re Flipping It Too Soon
Traditional thin dosa is usually cooked on one side until the bottom is brown and crispy. If you move or flip it too quickly, the bottom may not get the shape you want.
The Simple Fix
Before changing your entire dosa recipe, check these five things: fermentation, batter thickness, pan temperature, spreading technique, and cooking time. Once you get these things under control, it becomes much easier to tell the difference between a soft homemade dosa and a thin and crunchy dosa.
Related: Easy Breakfast Recipes
What Makes Restaurant-Style Dosa So Crisp?
That light crunchiness isn’t created by any one secret ingredient. The texture of a great dosa depends on the combined action of its batter, fermentation, frying, heat, and spreading technique.
Think of crispy dosa as a balance of four things: properly fermented batter, the right batter consistency, a well-heated cooking surface, and thin, even spreading.
Fermented Batter
Good fermentation contributes to the characteristic flavor and texture of dosa.
Correct Consistency
The batter needs to flow easily enough to spread into a thin layer.
Steady Heat
A properly heated tawa helps the dosa cook and brown evenly.
Thin Spreading
A thin layer gives moisture more opportunity to cook away and the base to crisp.
How These Factors Work Together
Start With Properly Fermented Batter
Fermentation changes the batter and develops the characteristic tang and aroma associated with dosa. The exact fermentation time depends on room temperature, ingredients, and other conditions, so look for signs of active fermentation rather than relying only on the clock.
Get the Batter Consistency Right
Batter that is too thick can produce a heavier dosa that is difficult to spread thinly. Batter that is too loose can be difficult to control. Aim for a smooth, pourable consistency that spreads easily across the tawa.
Preheat the Tawa Properly
The cooking surface needs enough heat to begin cooking the batter as soon as it hits the pan. If the surface is too cool, spreading and sticking can become problems. If it is excessively hot, the batter may set before you can spread it evenly.
Spread Quickly but Gently
Pour the batter into the center and use the back of the ladle to move outward in widening circles. The goal is a thin, even layer—not aggressive pressure that tears the batter.
One important takeaway: a cast-iron tawa can help with heat retention, but it cannot compensate for poorly fermented batter or incorrect technique. If you are struggling with crispy dosa, work on the entire process rather than changing the pan alone.
Related: Easy Breakfast Ideas
Cast-Iron vs. Nonstick Tawa for Crispy Dosa Recipe
The pan you use will determine how easily your dosa spreads, how evenly it cooks, and how crispy the bottom is. But there is no one pan that is right for all cooks.
| Feature | Cast-Iron Tawa | Nonstick Tawa |
|---|---|---|
| Heat retention | Excellent once thoroughly heated | Generally heats quickly but may lose heat more readily |
| Dosa texture | Excellent for thin, crisp dosa when properly seasoned and heated | Can produce good dosa, particularly when temperature is controlled well |
| Seasoning | Requires seasoning and ongoing care | No seasoning required |
| Heat management | Retains heat strongly, so adjustments may take time | Usually responds more quickly to temperature changes |
| Maintenance | Needs drying and light oiling after cleaning | Usually easier to clean |
| Long-term durability | Can last for many years with proper care | Depends on the construction and condition of the coating |
Why Use a Cast-Iron Dosa Tawa?
Cast iron is valued for its ability to retain heat. Once the tawa is properly preheated, that stored heat can help maintain a consistent cooking surface as you spread and cook thin dosa.
- Strong heat retention
- Excellent for frequent dosa making
- Can develop a naturally seasoned cooking surface
- Very durable when maintained properly
When Is Nonstick a Good Choice?
Nonstick cookware can be easier for beginners because the cooking surface requires less maintenance and can make releasing the finished dosa straightforward. It can also work well when you prefer a lighter pan and quick temperature changes.
- Easy to clean
- Convenient for beginners
- Usually requires little or no seasoning
- Can make good dosa with proper heat control
Looking for a Dedicated Dosa Tawa?
If you make dosa regularly, a dedicated cast-iron dosa tawa can be a worthwhile addition to your kitchen. Look for a broad, reasonably heavy cooking surface that suits your stovetop and is comfortable for you to handle.
Remember: changing your tawa won’t automatically solve every dosa problem. If your batter isn’t fermented properly or your heat is too high or too low, even a good cast-iron pan can give disappointing results. Think of the tawa as one part of the process—not the entire secret.
Restaurant Style Dosa Batter Ingredients
A good dosa batter doesn’t need a long list of ingredients. The traditional combination of rice, biuli dal and a little fenugreek forms the base. Urad dal is a type of pulse, and learning a little about pulses and legumes can also help explain why ingredients such as dal play such an important role in traditional food cultures around the world. The real work comes during the soaking, battering, fermentation and cooking.
What You’ll Need
- Idli rice 1 cup
- Urad dal ¼ cup
- Fenugreek seeds ¼ tsp
- Salt To taste
- Water As needed
- Oil or ghee For cooking
What Each Ingredient Does
🌾 Idli Rice
Idli rice is a parboiled rice commonly used in South Indian batters. It provides the rice component of the dosa batter and helps create the structure needed for a thin, spreadable dosa.
🥣 Urad Dal
Skinned split urad dal contributes body to the batter and is important for its fermented texture. Grinding it well helps produce a lighter batter.
🌿 Fenugreek Seeds
A small amount of fenugreek seeds is traditionally used in many dosa batter preparations. They can contribute flavor and are also associated with the fermentation process.
🧂 Salt
Salt seasons the batter. Add it according to taste and your preferred fermentation method.
How Much Water Should You Add?
There isn’t one exact water measurement that works every time because the amount can vary with the rice, dal, soaking, grinding method, and desired batter consistency. Add water gradually while grinding and later while adjusting the fermented batter. It should be smooth and pourable, but not watery.
How to Make Dosa Batter
The key to making dosa batter is to pay close attention to each step. Soak the rice and bily dal separately, grind them to the right amount, then mix them together and give the batter enough time to ferment before starting to cook.
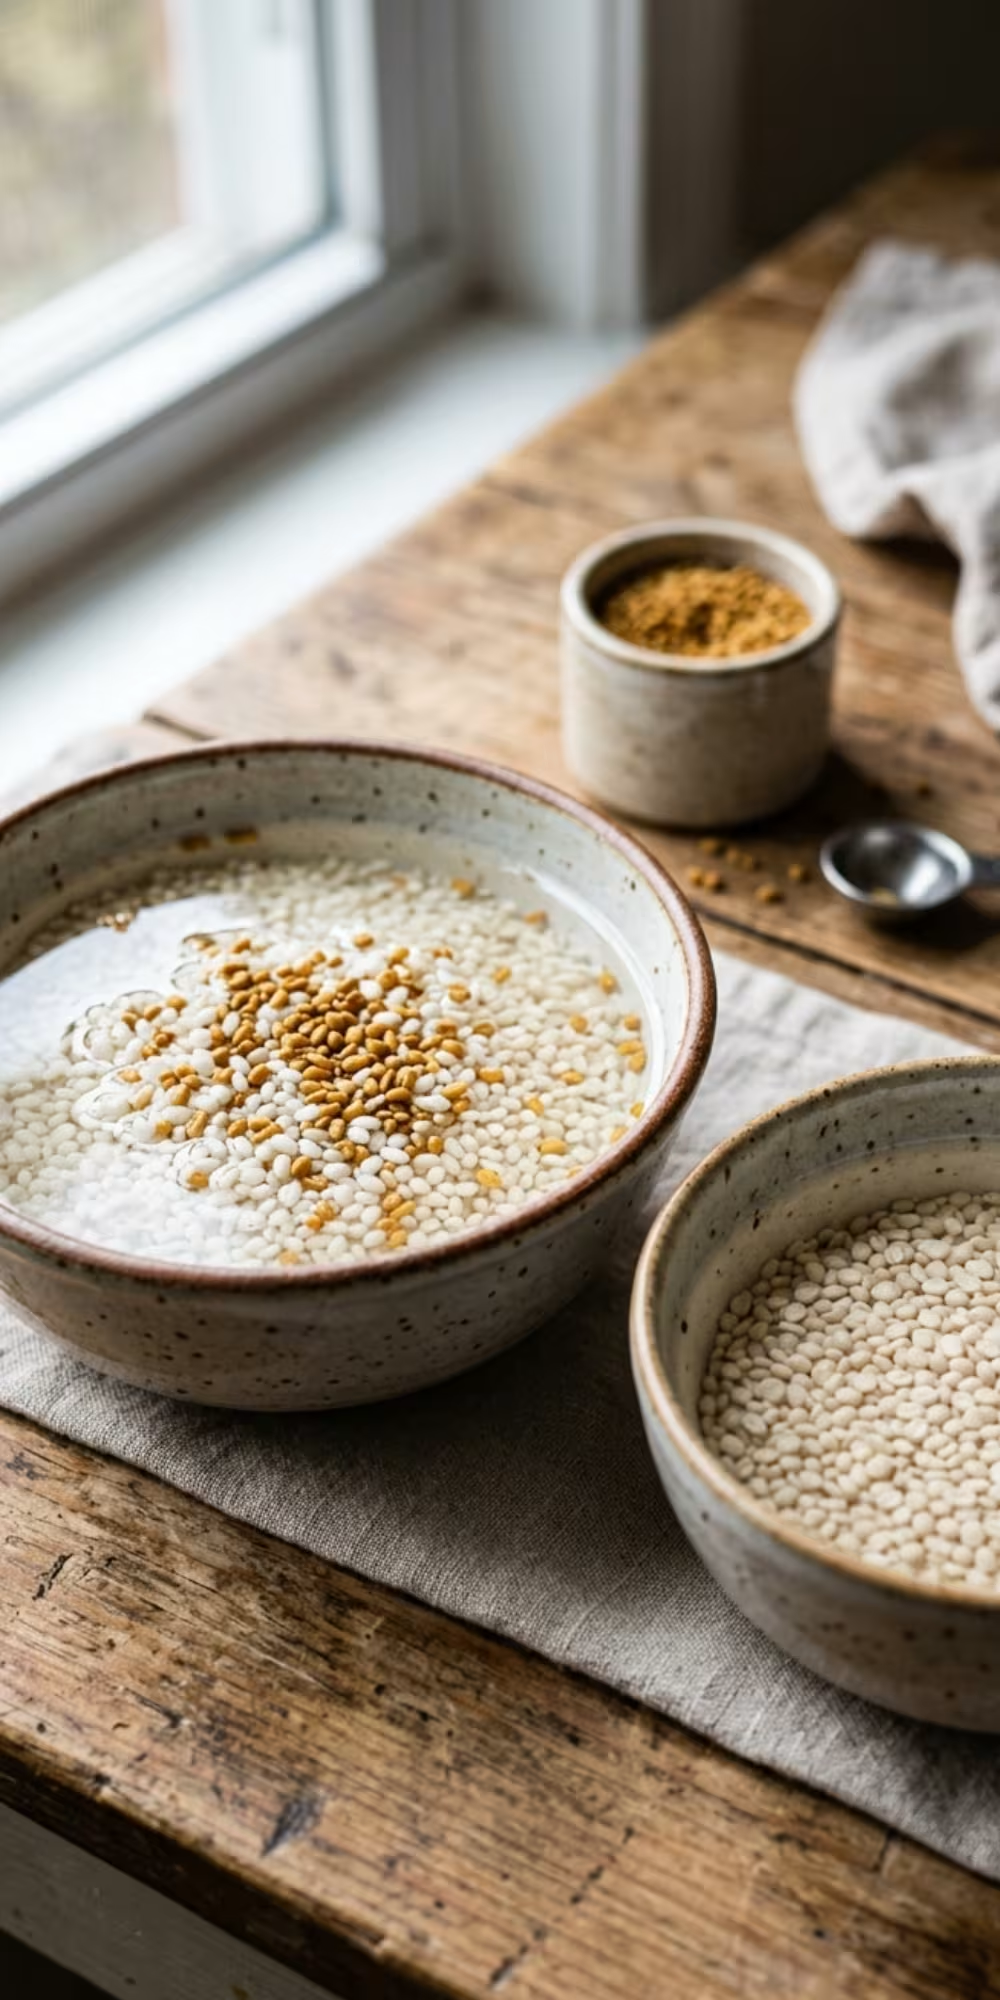
Soak the Rice and Fenugreek Seeds
Rinse the idli rice and fenugreek seeds, then place them in a bowl and cover with enough water. In a separate bowl, soak the skinned split urad dal.
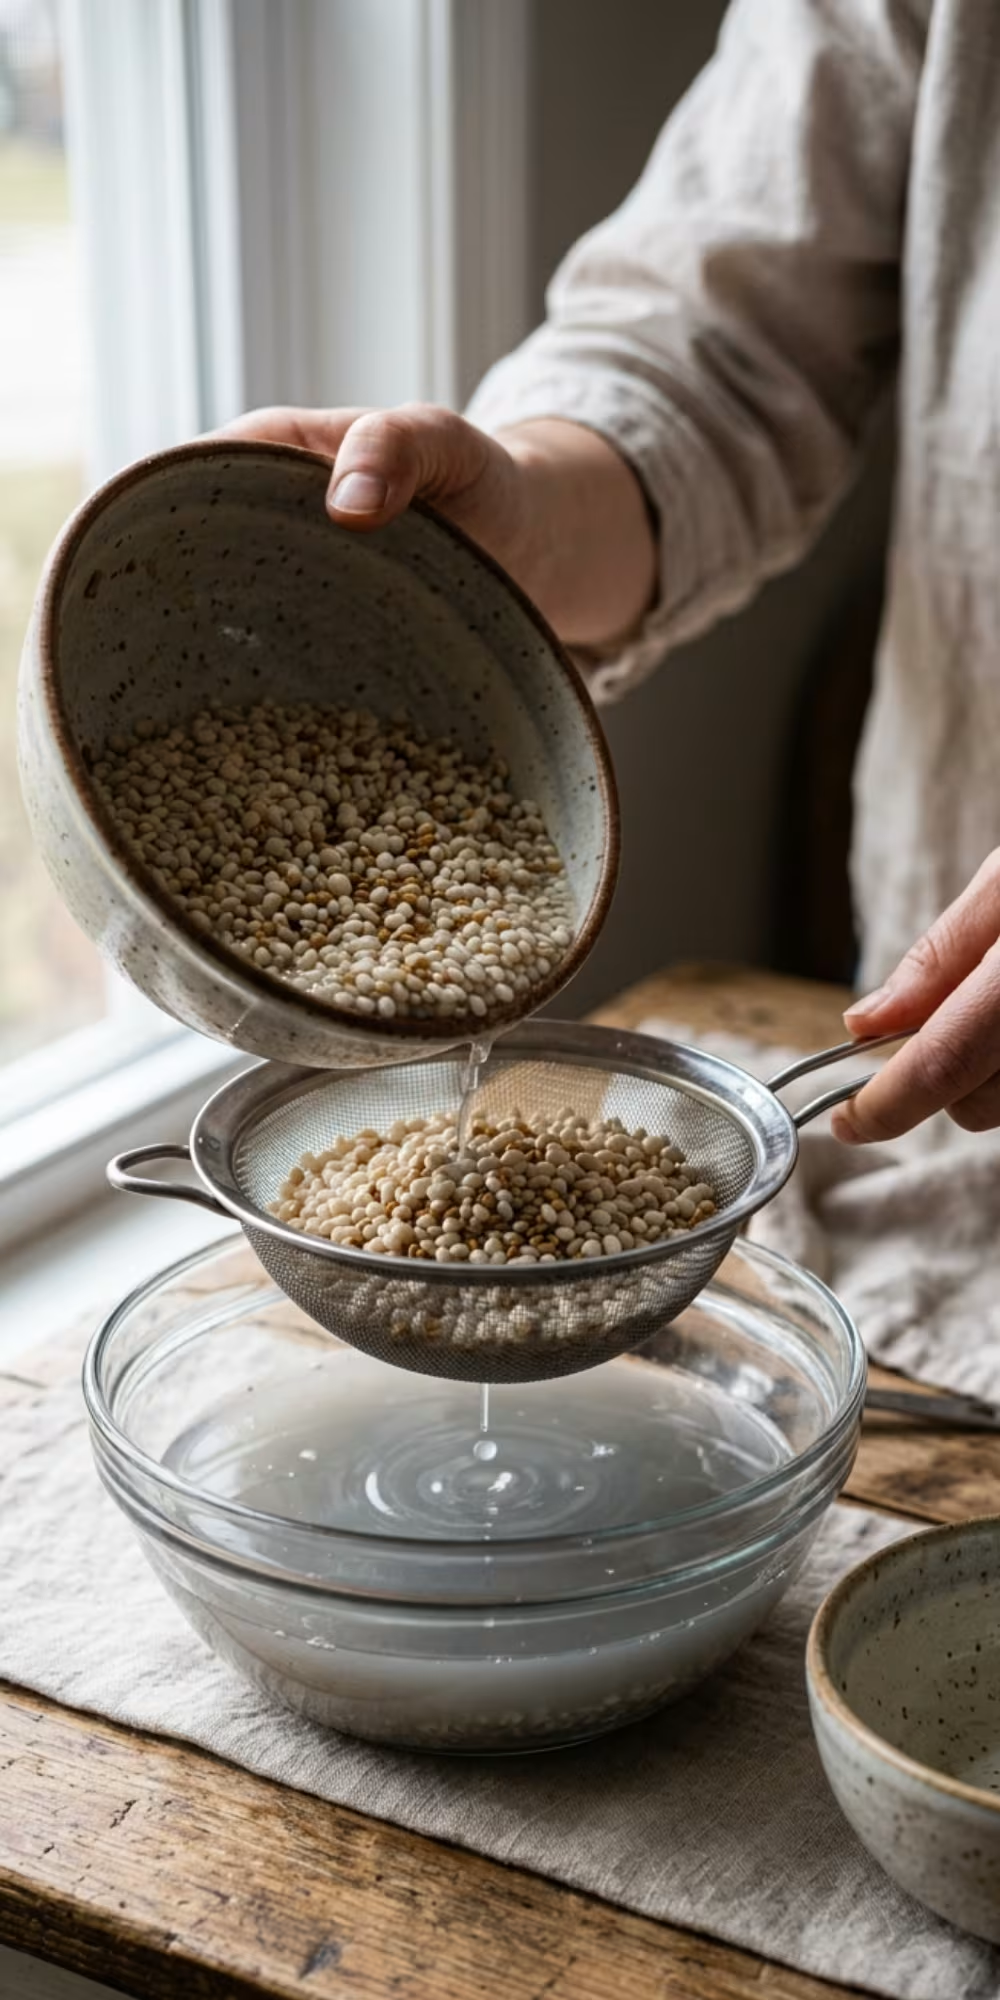
Drain the Soaked Ingredients
Once the soaking time is complete, drain the rice, fenugreek seeds, and urad dal thoroughly. You don’t need to remove every drop of water, but avoid carrying a large amount of soaking water into the grinder.
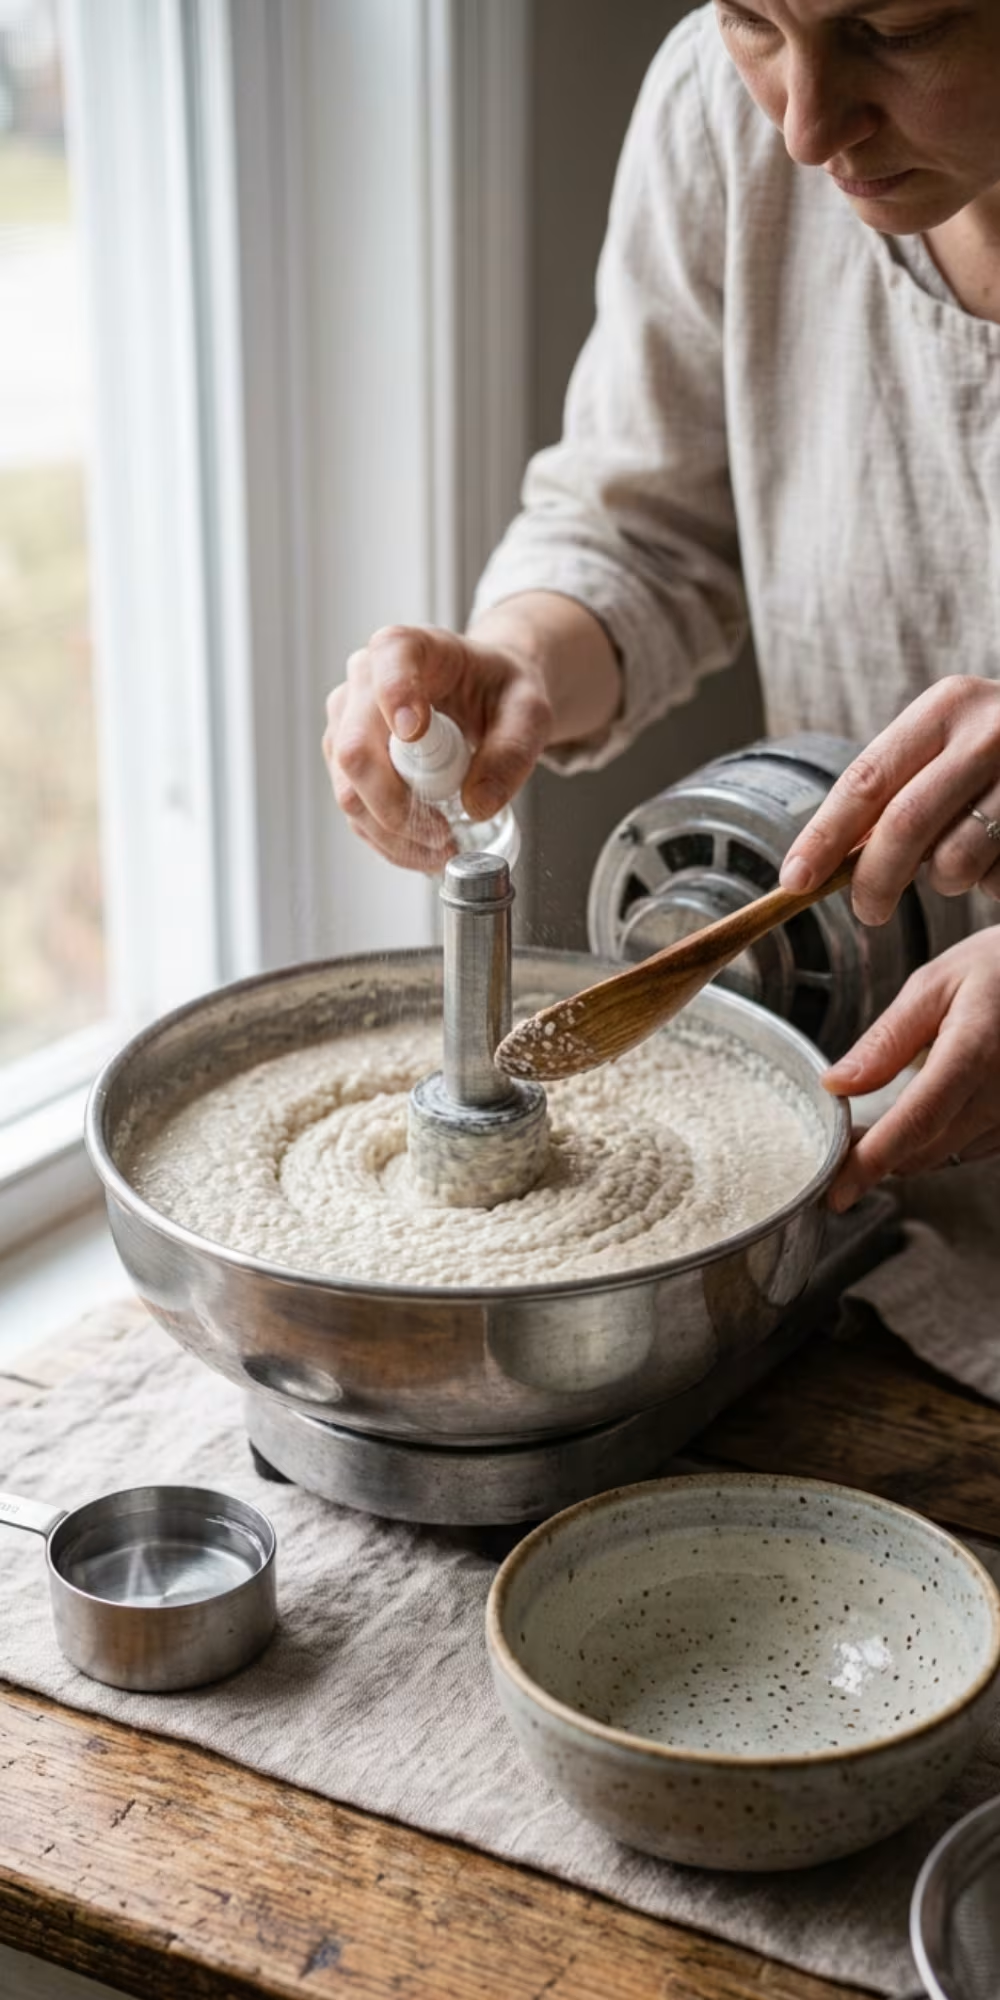
Grind the Urad Dal First
Grind the soaked urad dal first, adding water gradually as needed. Aim for a smooth, light, and fluffy batter rather than a dense paste. If your grinder becomes warm during the process, pause briefly or use cool water as needed to help keep the batter from becoming excessively warm.
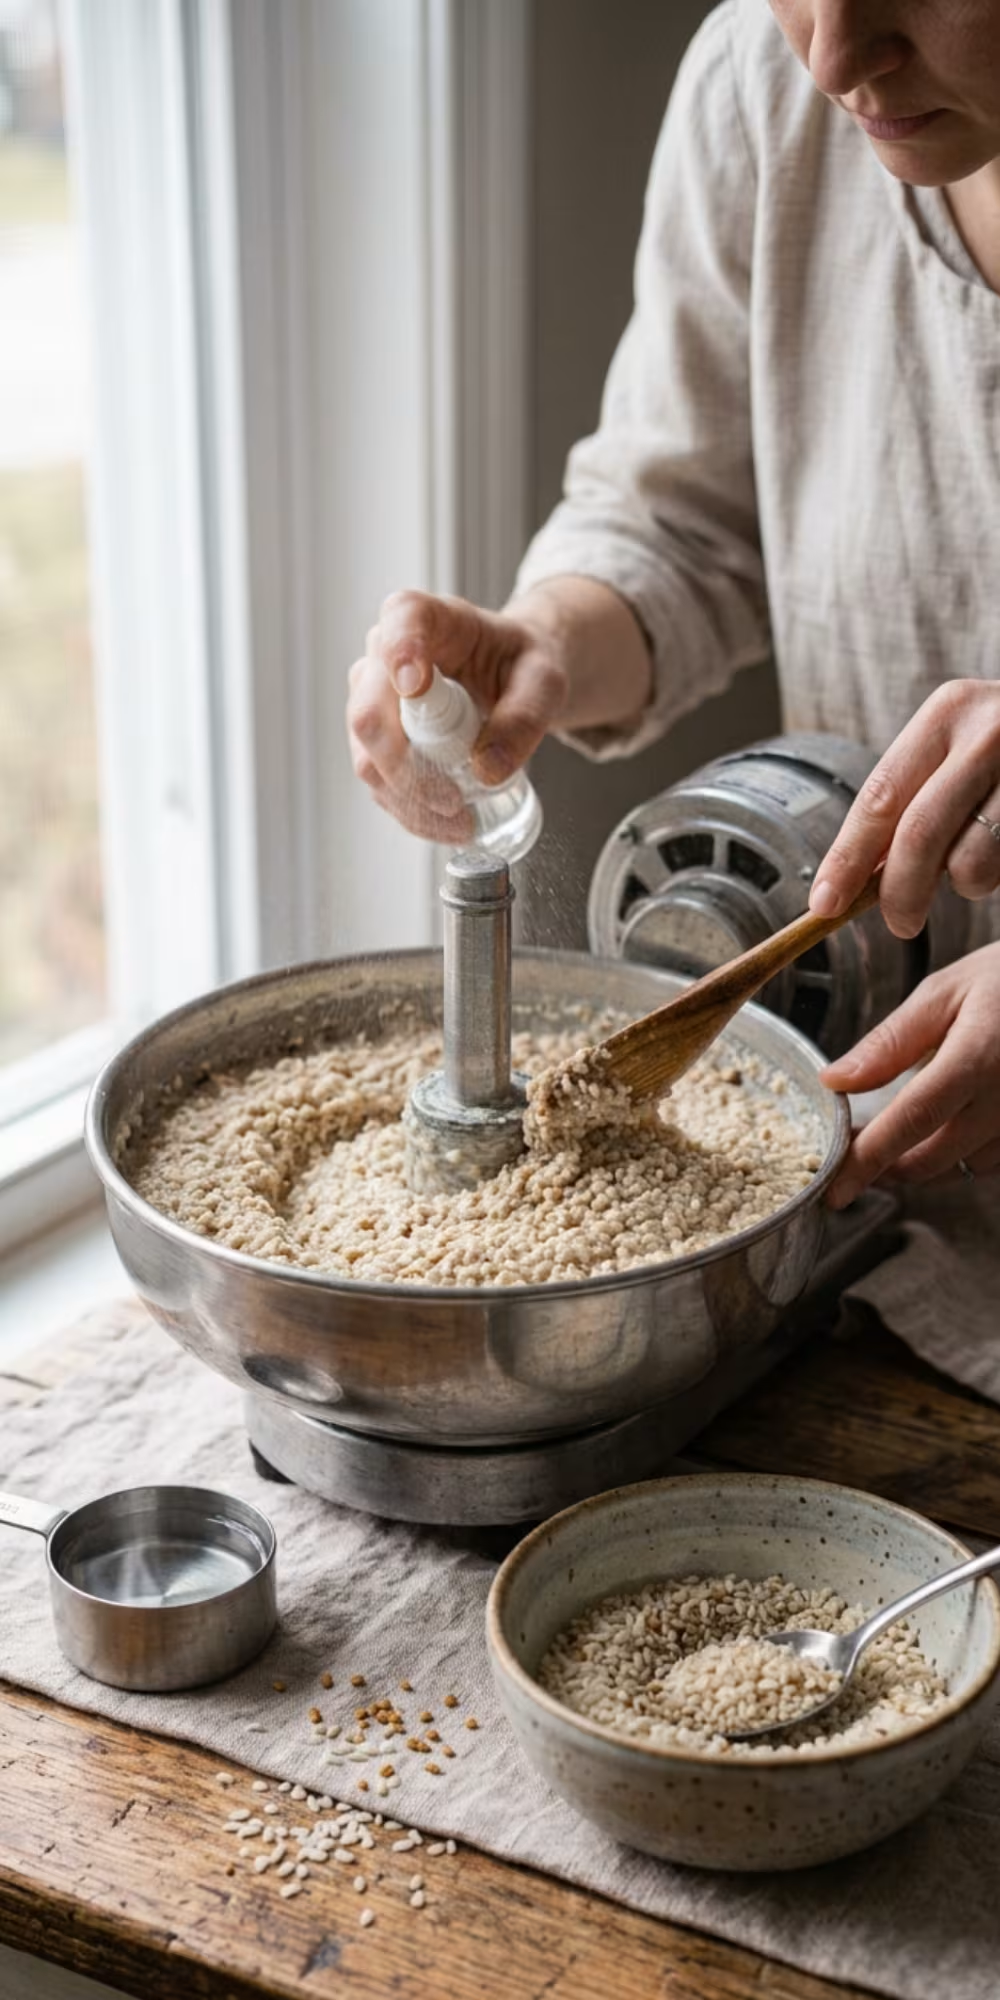
Grind the Rice
Grind the soaked rice and fenugreek seeds separately. For this style of dosa, the rice doesn’t need to be completely silky smooth. A fine, slightly textured batter can work well and gives you a good base for spreading.
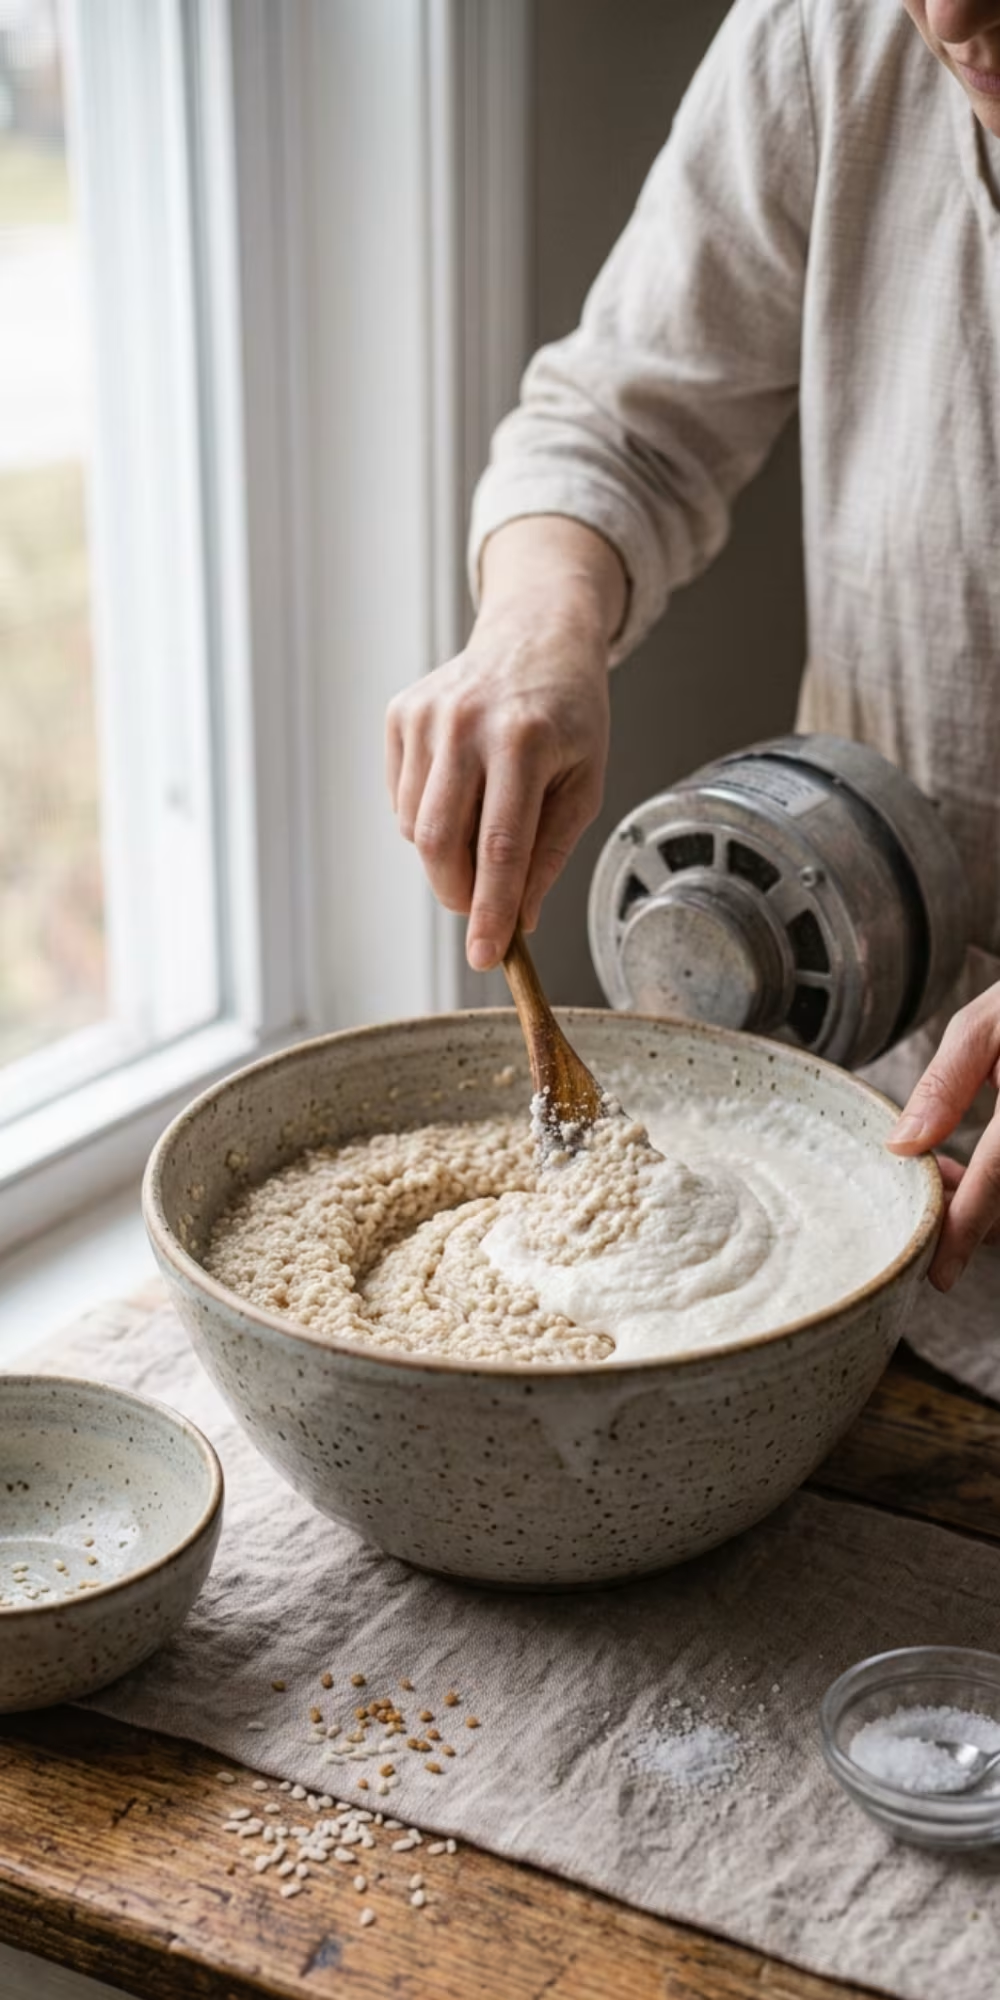
Combine the Two Batters
Transfer the rice batter and ground urad dal into a clean, large bowl. Add salt and mix thoroughly so the two batters are evenly combined.
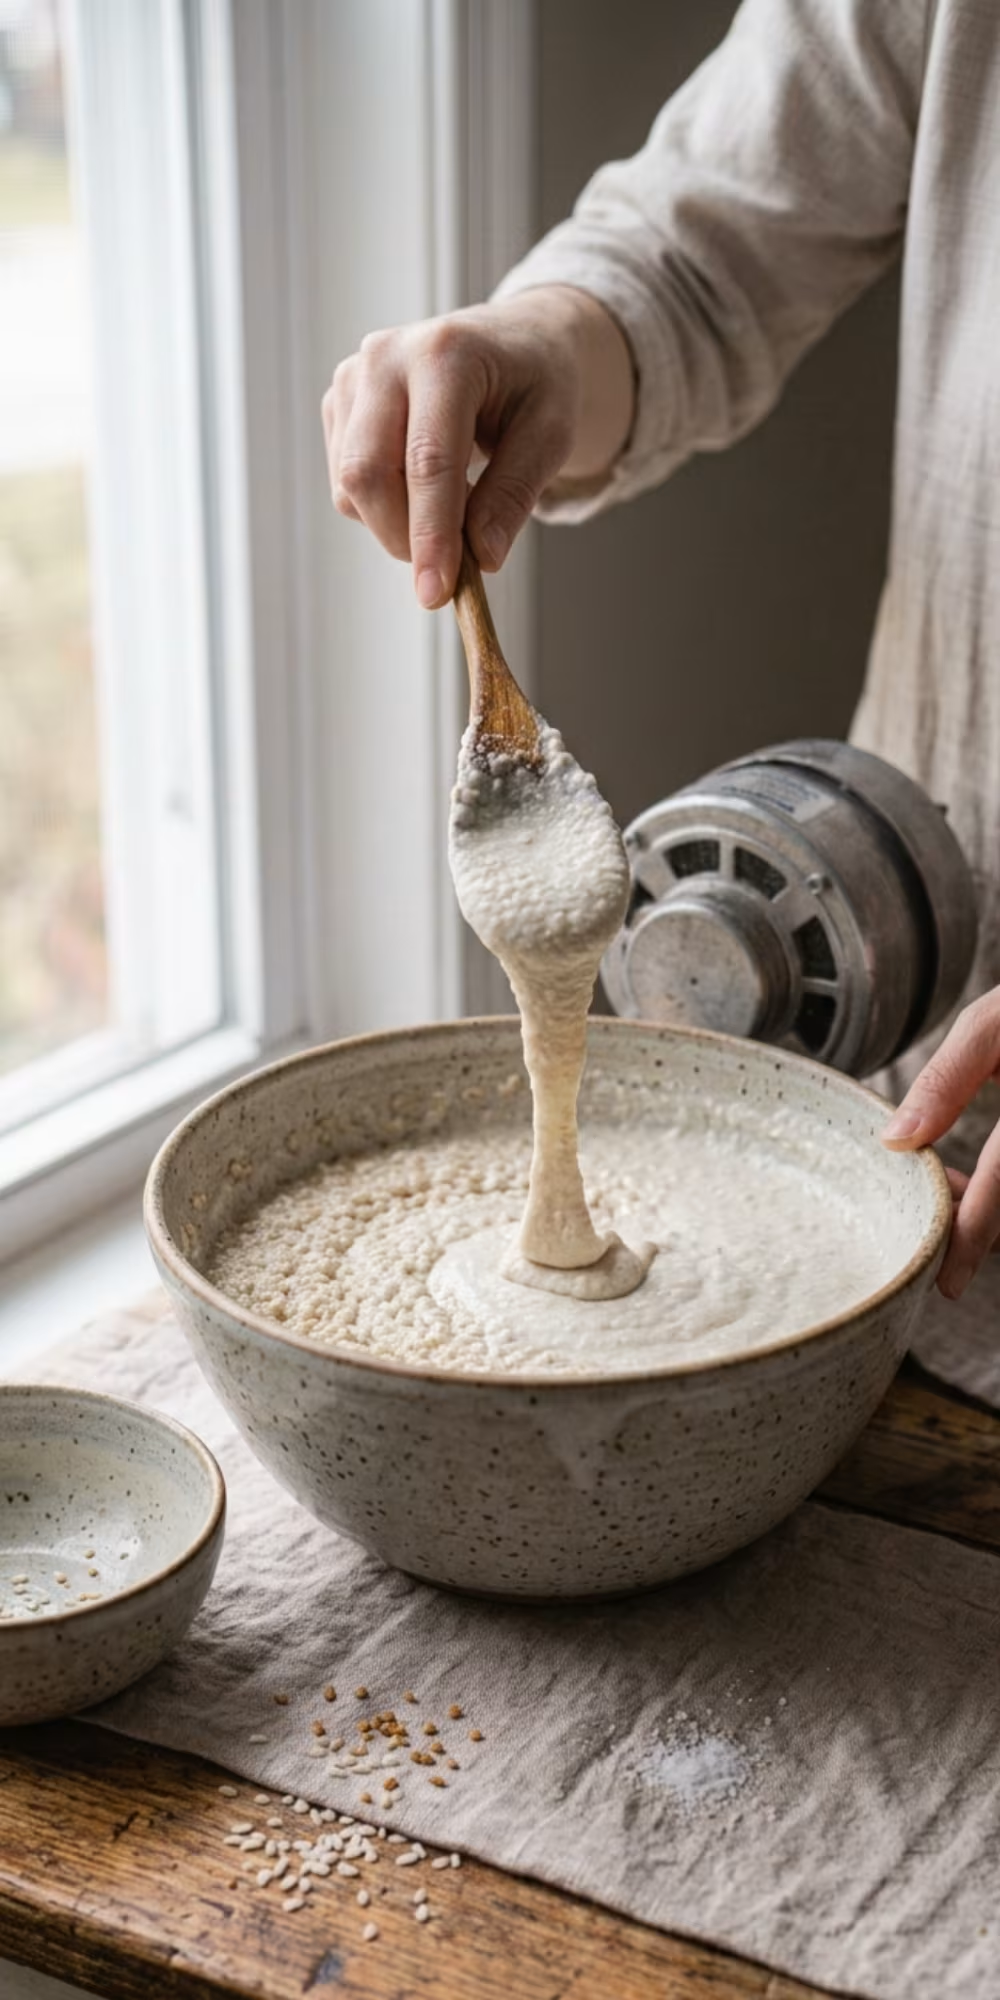
Check the Batter Consistency
The unfermented batter should be thick but pourable. It shouldn’t be so thick that it drops heavily from a ladle, and it shouldn’t be watery. You can make small adjustments with water later after fermentation if needed.
What Should Dosa Batter Look Like?
Consistency is easier to judge by how the batter behaves than by a single measurement. When you lift a ladle, the batter should flow smoothly rather than fall as a heavy lump.
Next step: cover the batter and let it ferment. Don’t rush this stage—the fermentation process is one of the most important parts of making flavorful, well-textured dosa. In the next section, we’ll look at how long dosa batter should ferment and how to tell when it’s ready.
How Long Should Dosa Batter Ferment?
Fermentation is one of the most important stages in making dosa. It changes the taste, smell, texture, and cooking pattern of the batter. Instead of relying solely on the clock, learn to recognize the visual and tactile signs to understand when the batter is ready.
Fermentation is usually initiated within 8-12 hours or overnight, but fermentation time depends on room temperature, the type of batter, and your kitchen environment. It may ferment faster in a warm environment, while it may take significantly longer in a cooler kitchen.
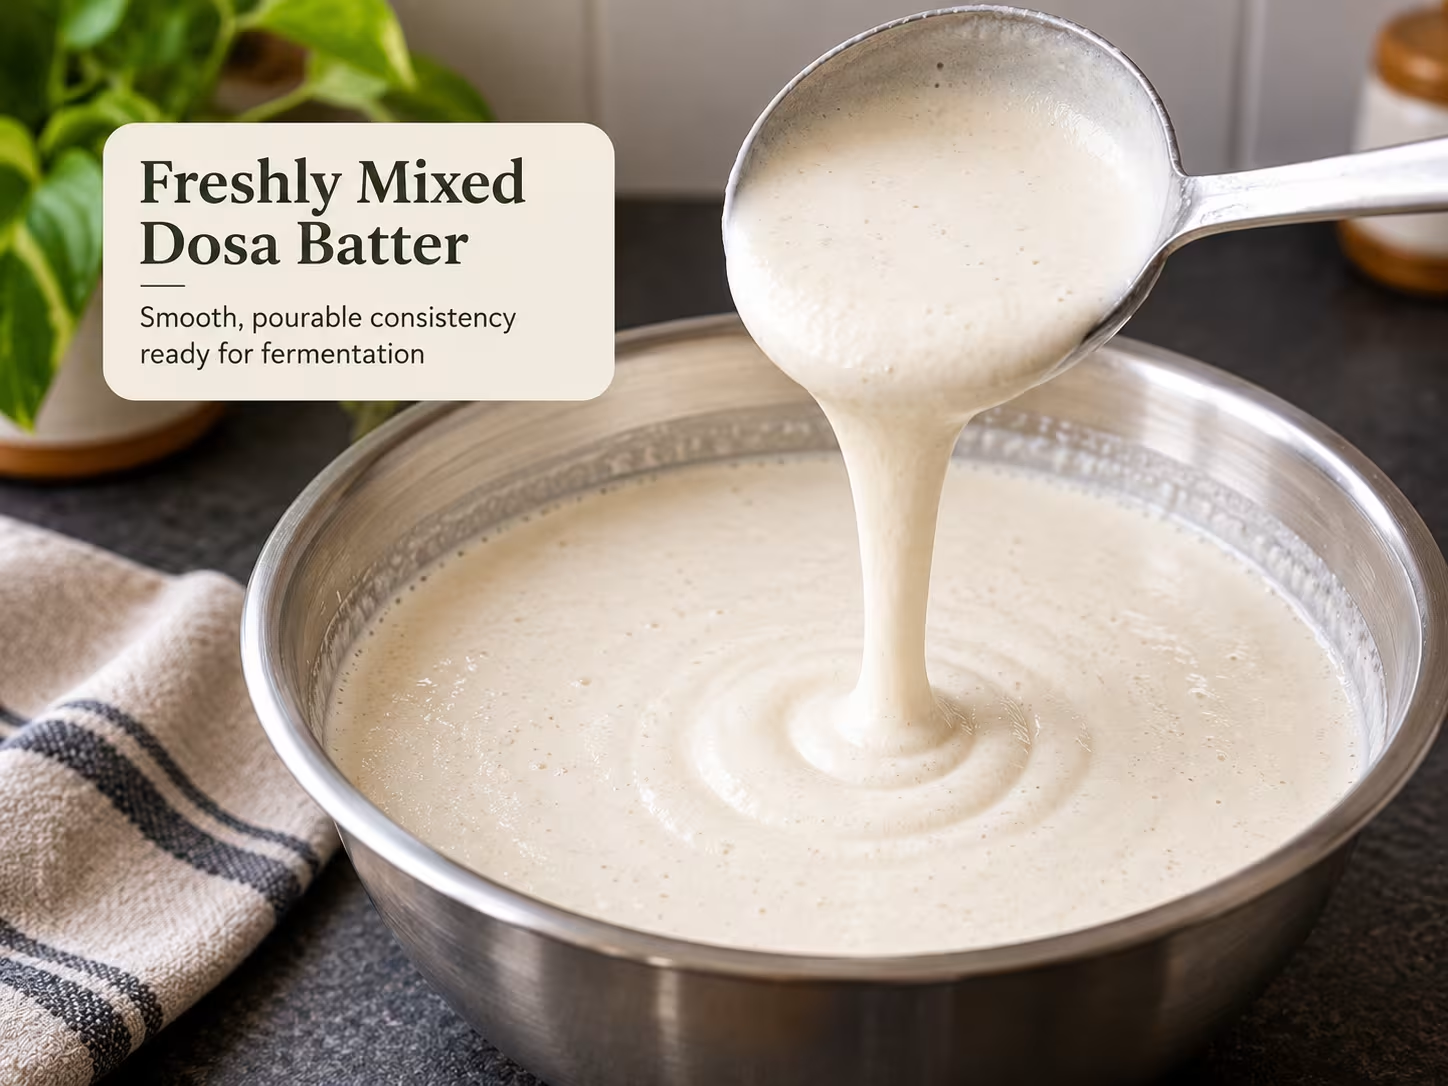
Freshly Mixed Batter
After mixing the rice and biuli dal, the mixture becomes relatively smooth and thick. There may be little or no visible change at this stage.
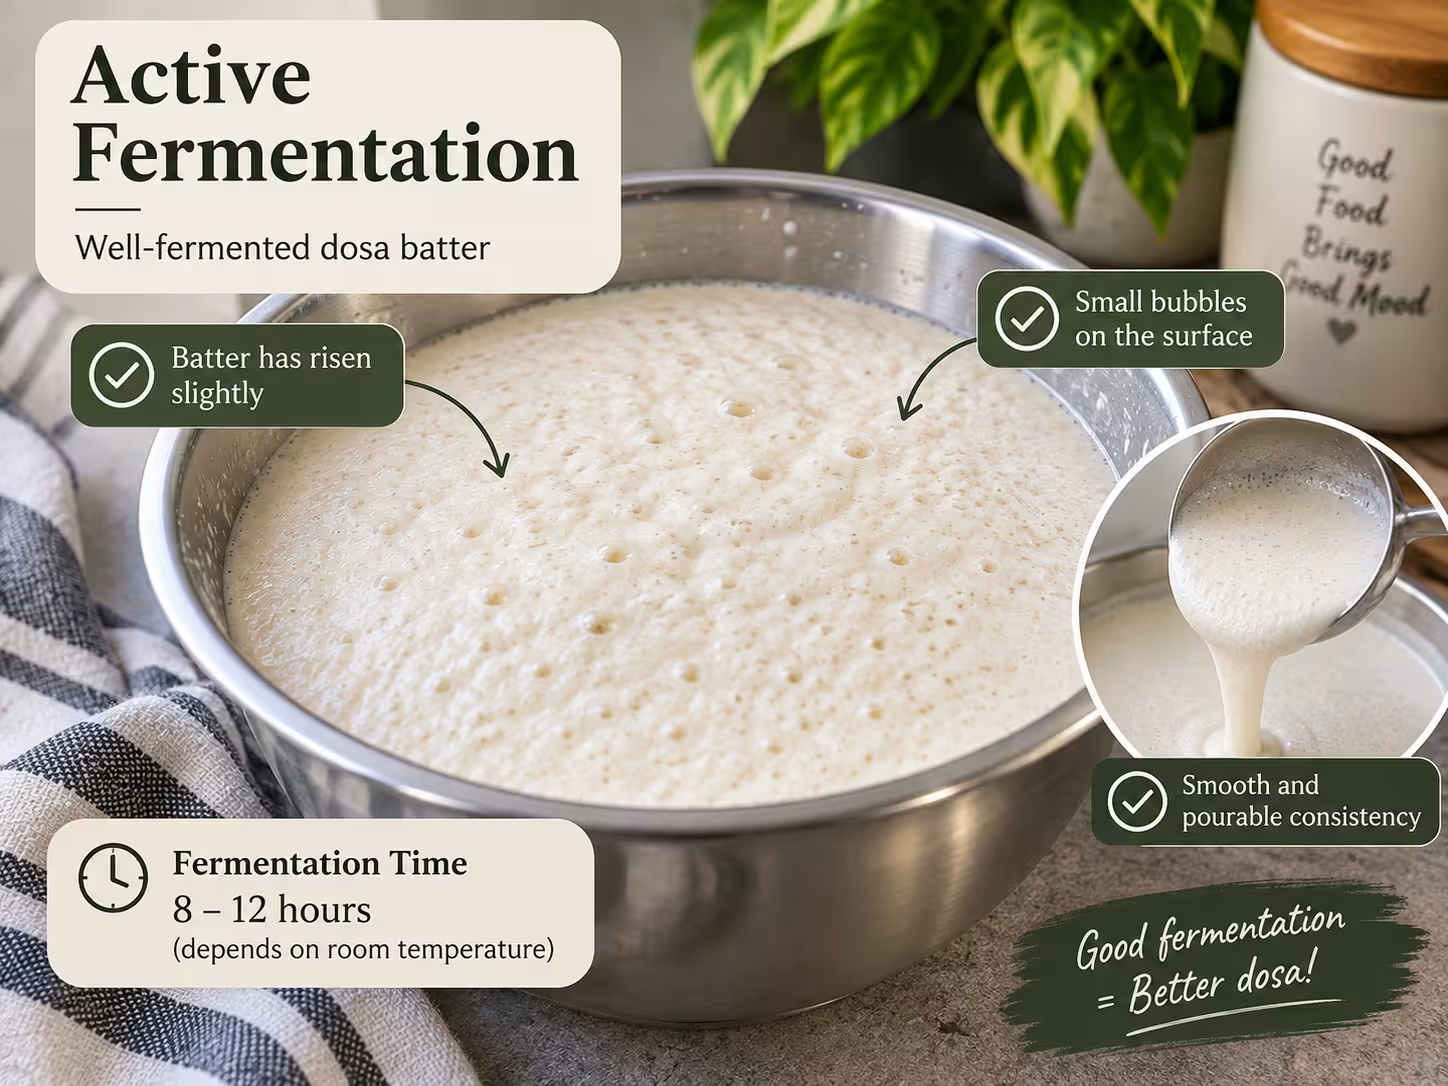
Active Fermentation
Look for a slight increase in volume, small bubbles, and a pleasant fermented smell. The batter will look lively, not completely flat.
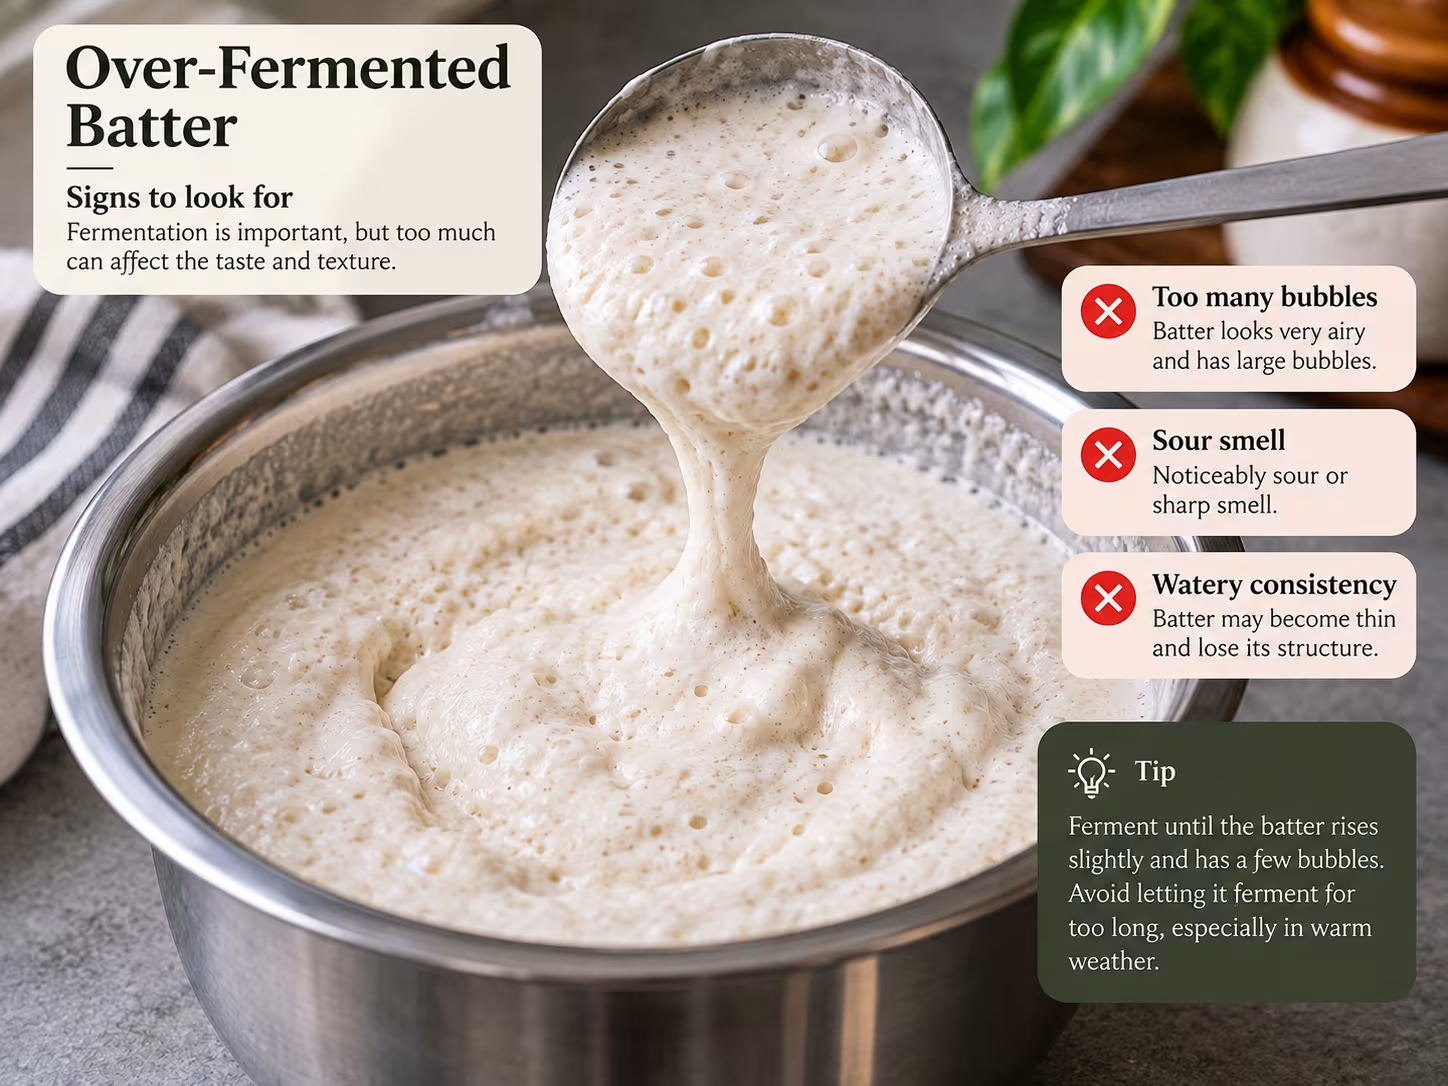
Over-Fermented Batter
Very strong sourness, excessive expansion, or a noticeably unpleasant smell can indicate that the batter has fermented too far. Timing and conditions matter, so use your senses as a guide.
How to Tell When Dosa Batter Is Ready
✓ Signs Your Batter Is Ready
- The batter has increased in volume somewhat.
- You can see small bubbles or air pockets.
- It has a pleasant fermented aroma.
- The batter looks lighter and more aerated.
- It remains pourable and can be adjusted with water before cooking.
⚠ Signs It May Need More Time
- The batter looks completely flat.
- There are very few or no visible bubbles.
- It still smells primarily of raw soaked rice and dal.
- The batter hasn’t shown noticeable fermentation activity.
- Your kitchen has been particularly cool.
Your Kitchen Temperature Matters
Fermentation isn’t governed by a universal timer. The temperature of your kitchen can make a significant difference, which is why two batches made with the same ingredients may be ready at different times.
Common Dosa Fermentation Problems
My Batter Didn’t Rise
A cool kitchen, weak fermentation conditions, or other changes in the batter can slow the process. Give it more time and check for bubbles and aroma before deciding it has failed.
My Batter Became Too Sour
Strong sourness can be a sign that fermentation has continued too long for your conditions. Refrigerating the batter once it reaches the desired fermentation level can help slow further activity.
My Dosa Is Still Soft
Fermentation alone doesn’t determine crispness. Also check the batter consistency, tawa temperature, spreading technique, cooking time, and amount of oil.
Best rule to remember: use the recipe’s 8–12 hour range as a starting point, but let the batter tell you when it is ready. A slightly risen batter with visible bubbles and a pleasant fermented aroma is a much better indicator than the clock alone.
How to Cook Crispy Dosa
Once your dosa batter is properly fermented, the cooking technique becomes key to achieving that thin, crispy texture. Start with a well-heated pan, spread the batter quickly and evenly, and let the dosa cook until the bottom is nicely golden.
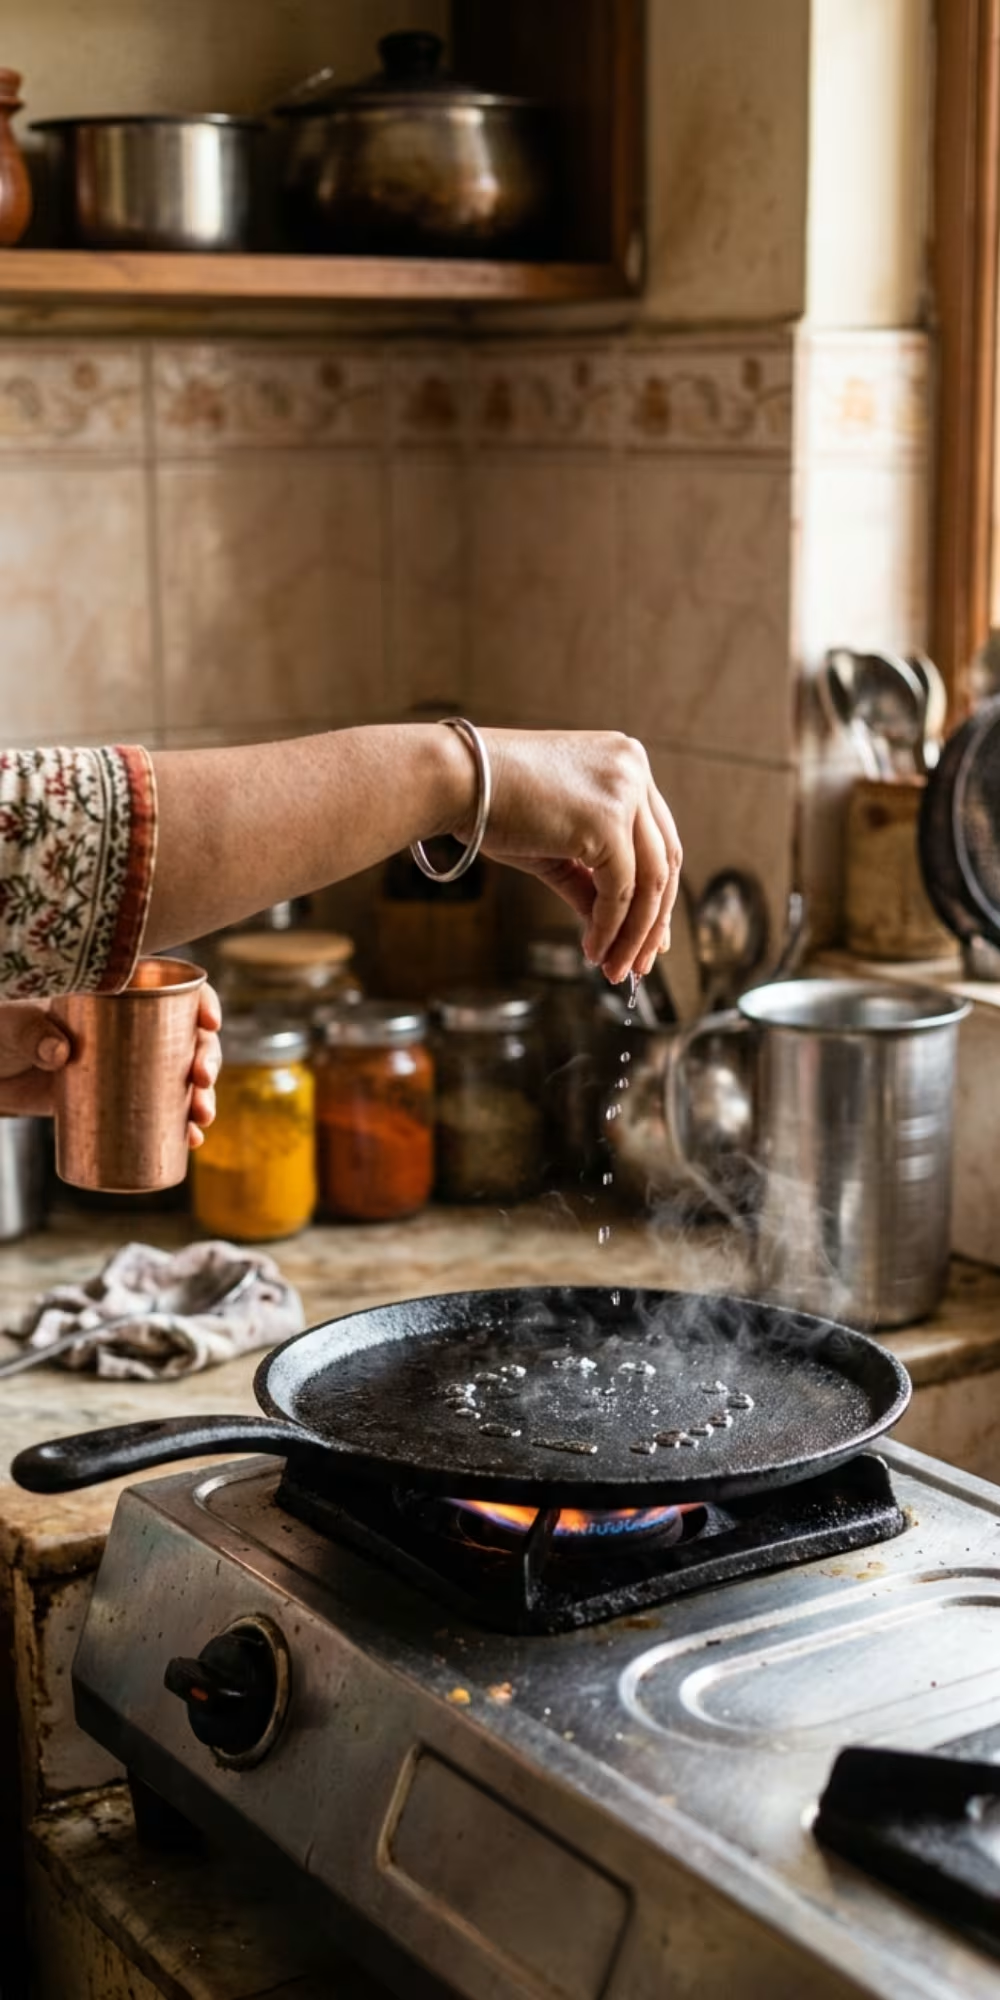
Heat the Tawa Properly
Place your dosa tawa over medium-high to high heat and allow it to become properly heated before adding batter. A simple water-drop test can help you judge the heat: a small drop should sizzle on contact and evaporate quickly.
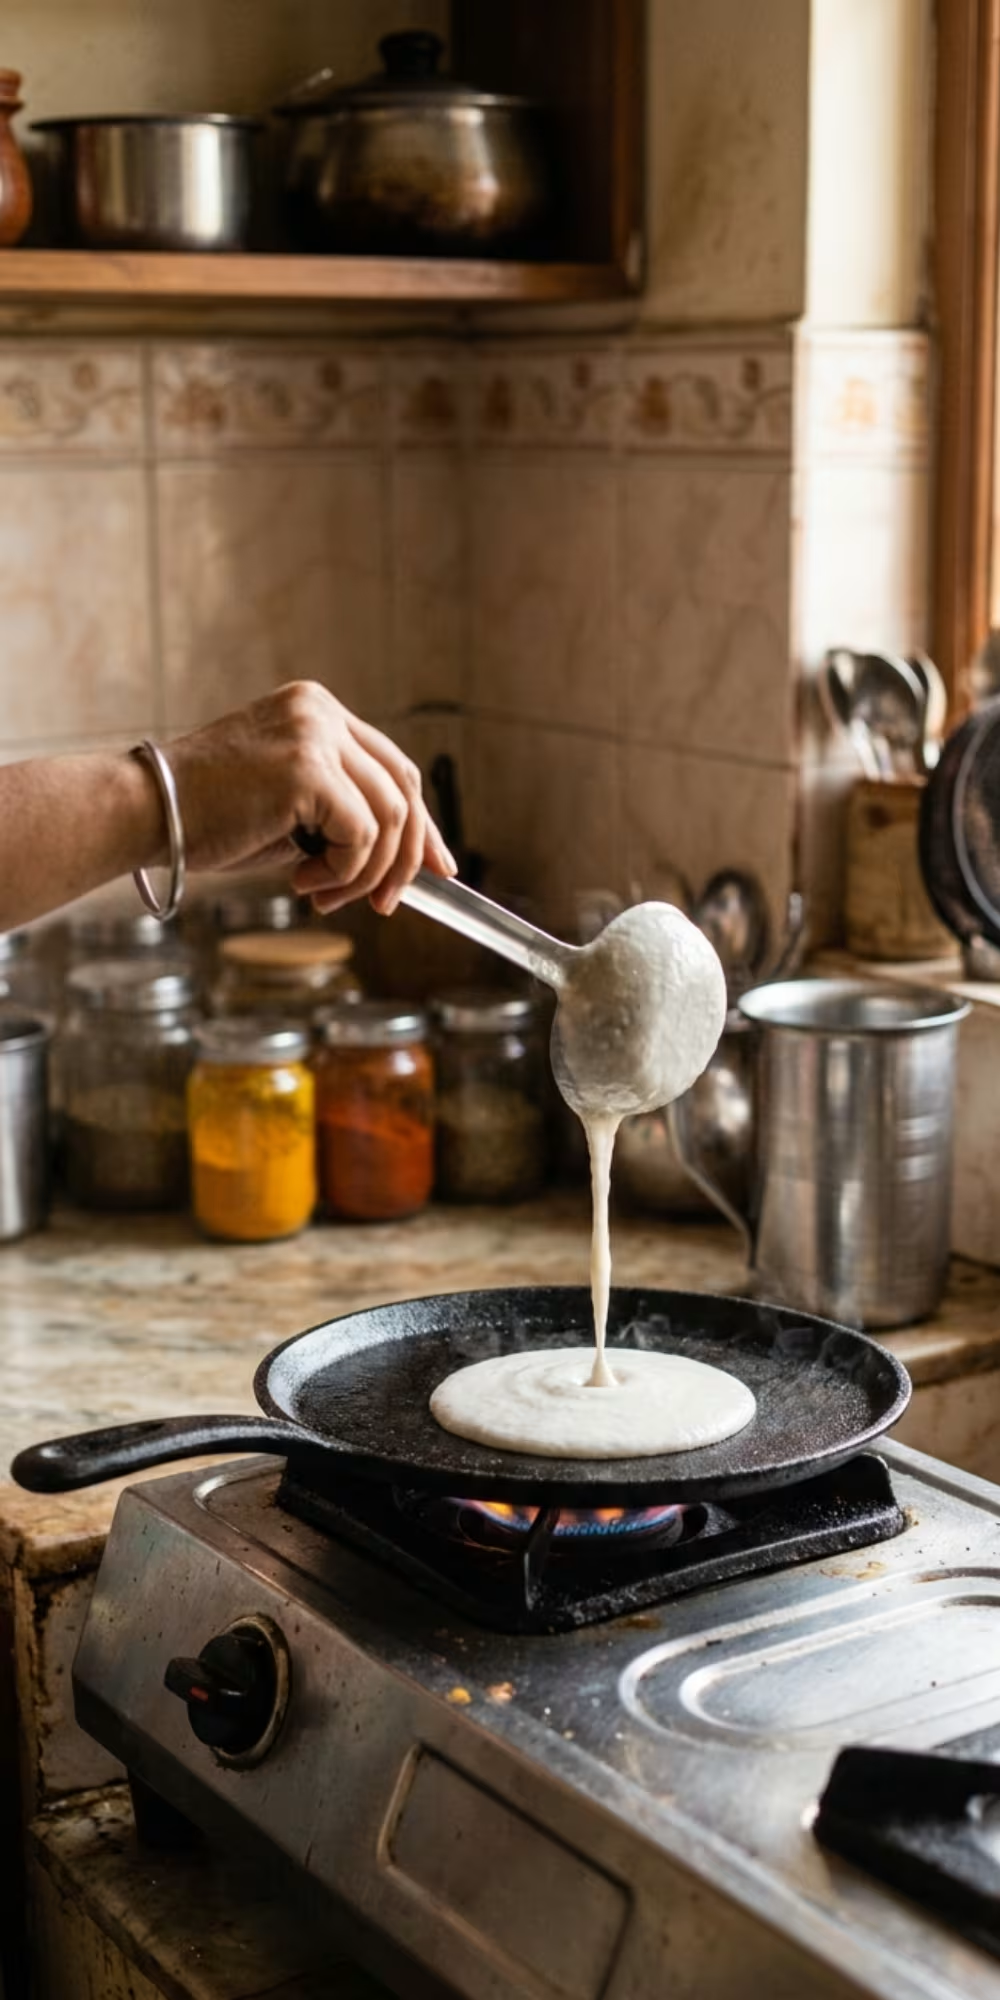
Pour the Batter in the Center
Give the batter a gentle stir if needed, then use a ladle to pour a portion into the center of the hot tawa. Don’t add too much batter—the amount you use affects how thin you can make the dosa.
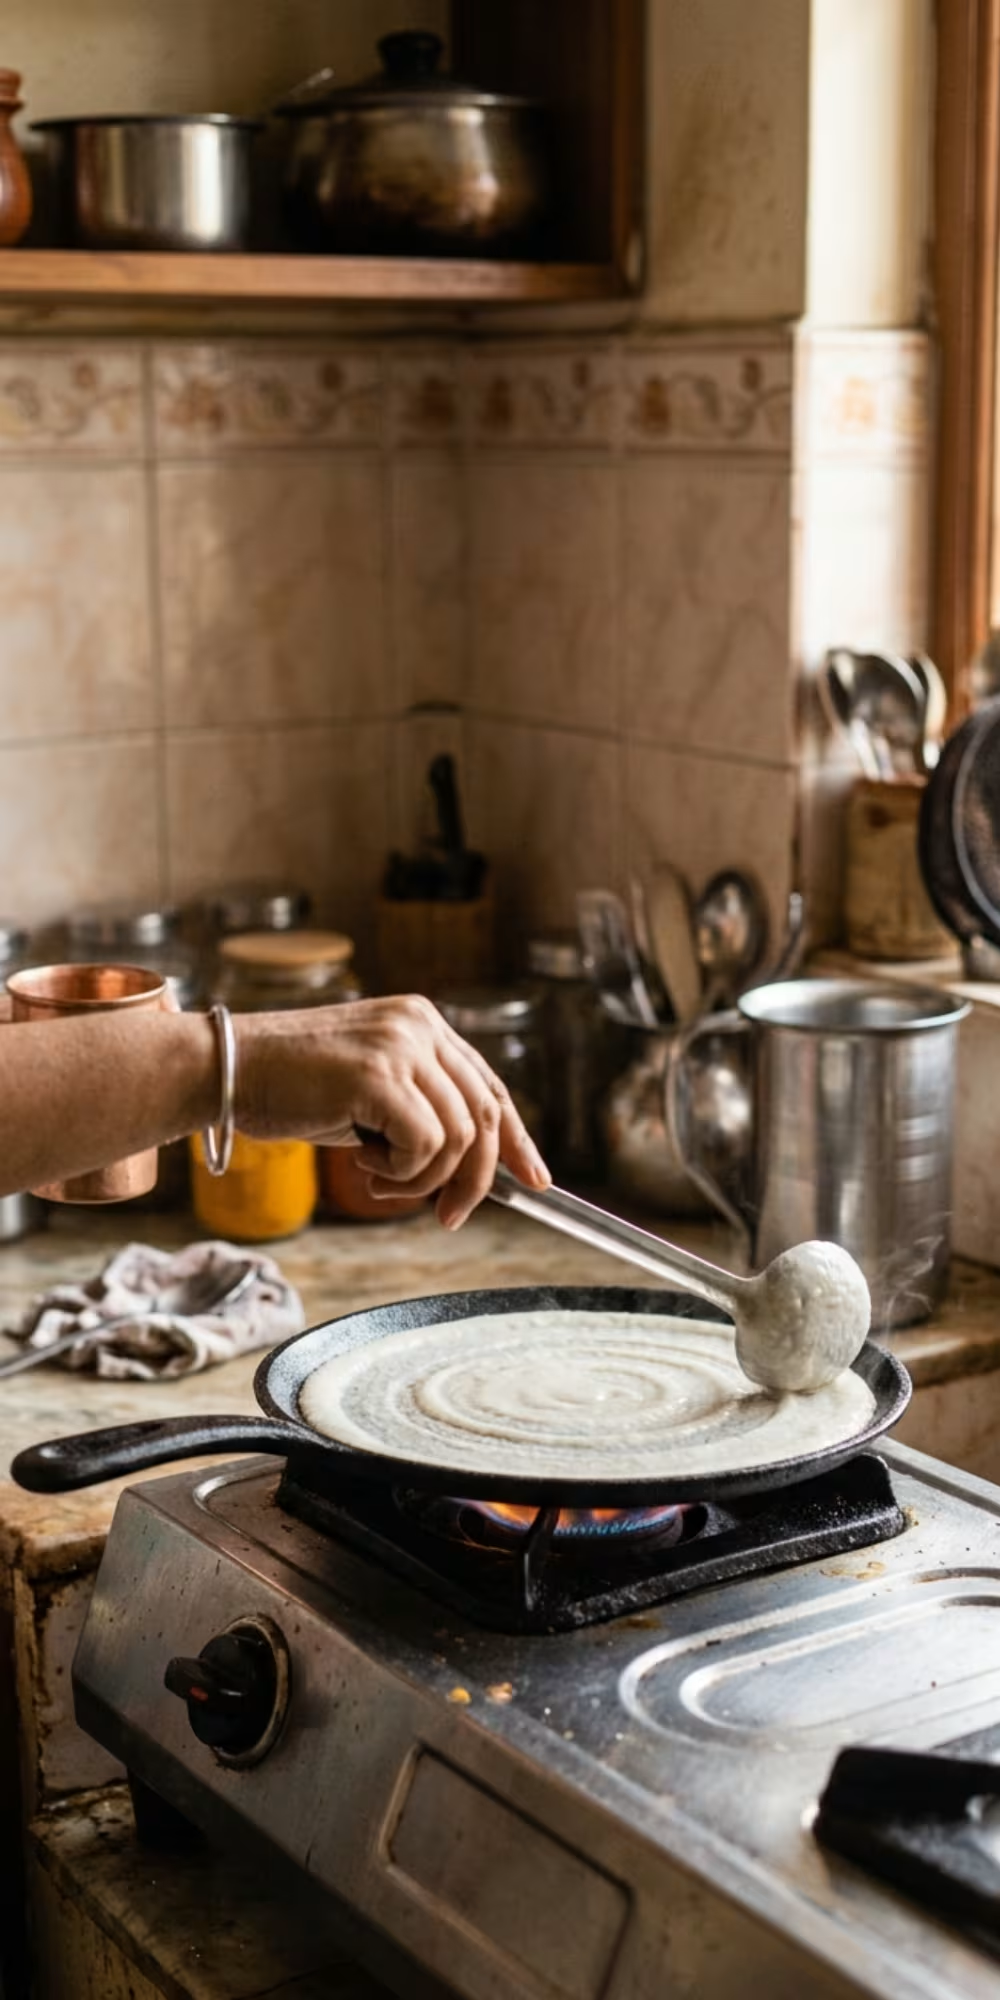
Spread the Dosa Into a Thin Circle
Immediately use the back of the ladle to spread the batter outward from the center in widening circular movements. Use light, steady pressure and work quickly enough that the batter doesn’t set before you’ve finished spreading.
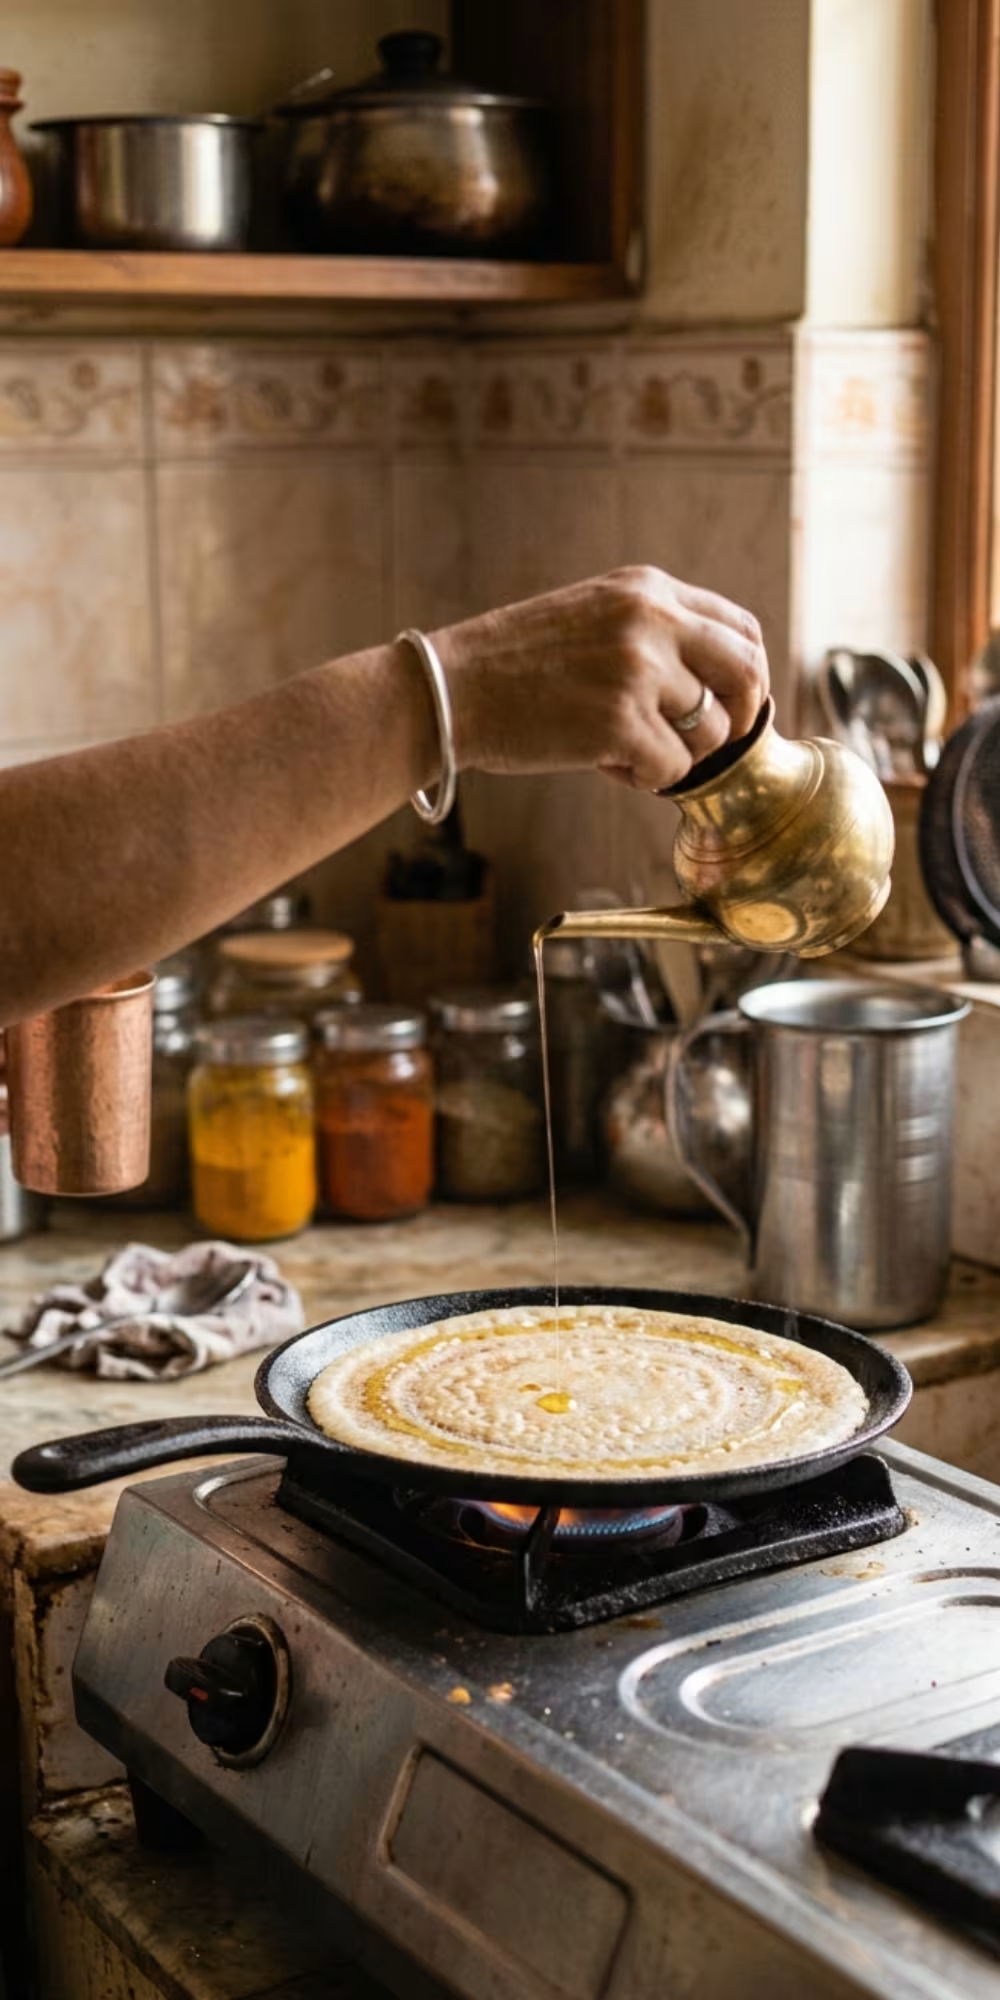
Add a Little Oil or Ghee
Once the dosa has been spread, drizzle a small amount of oil or ghee around the outer edges and, if desired, lightly over the surface. You don’t need a large amount—the dosa should cook against the hot tawa rather than sit in a pool of fat.
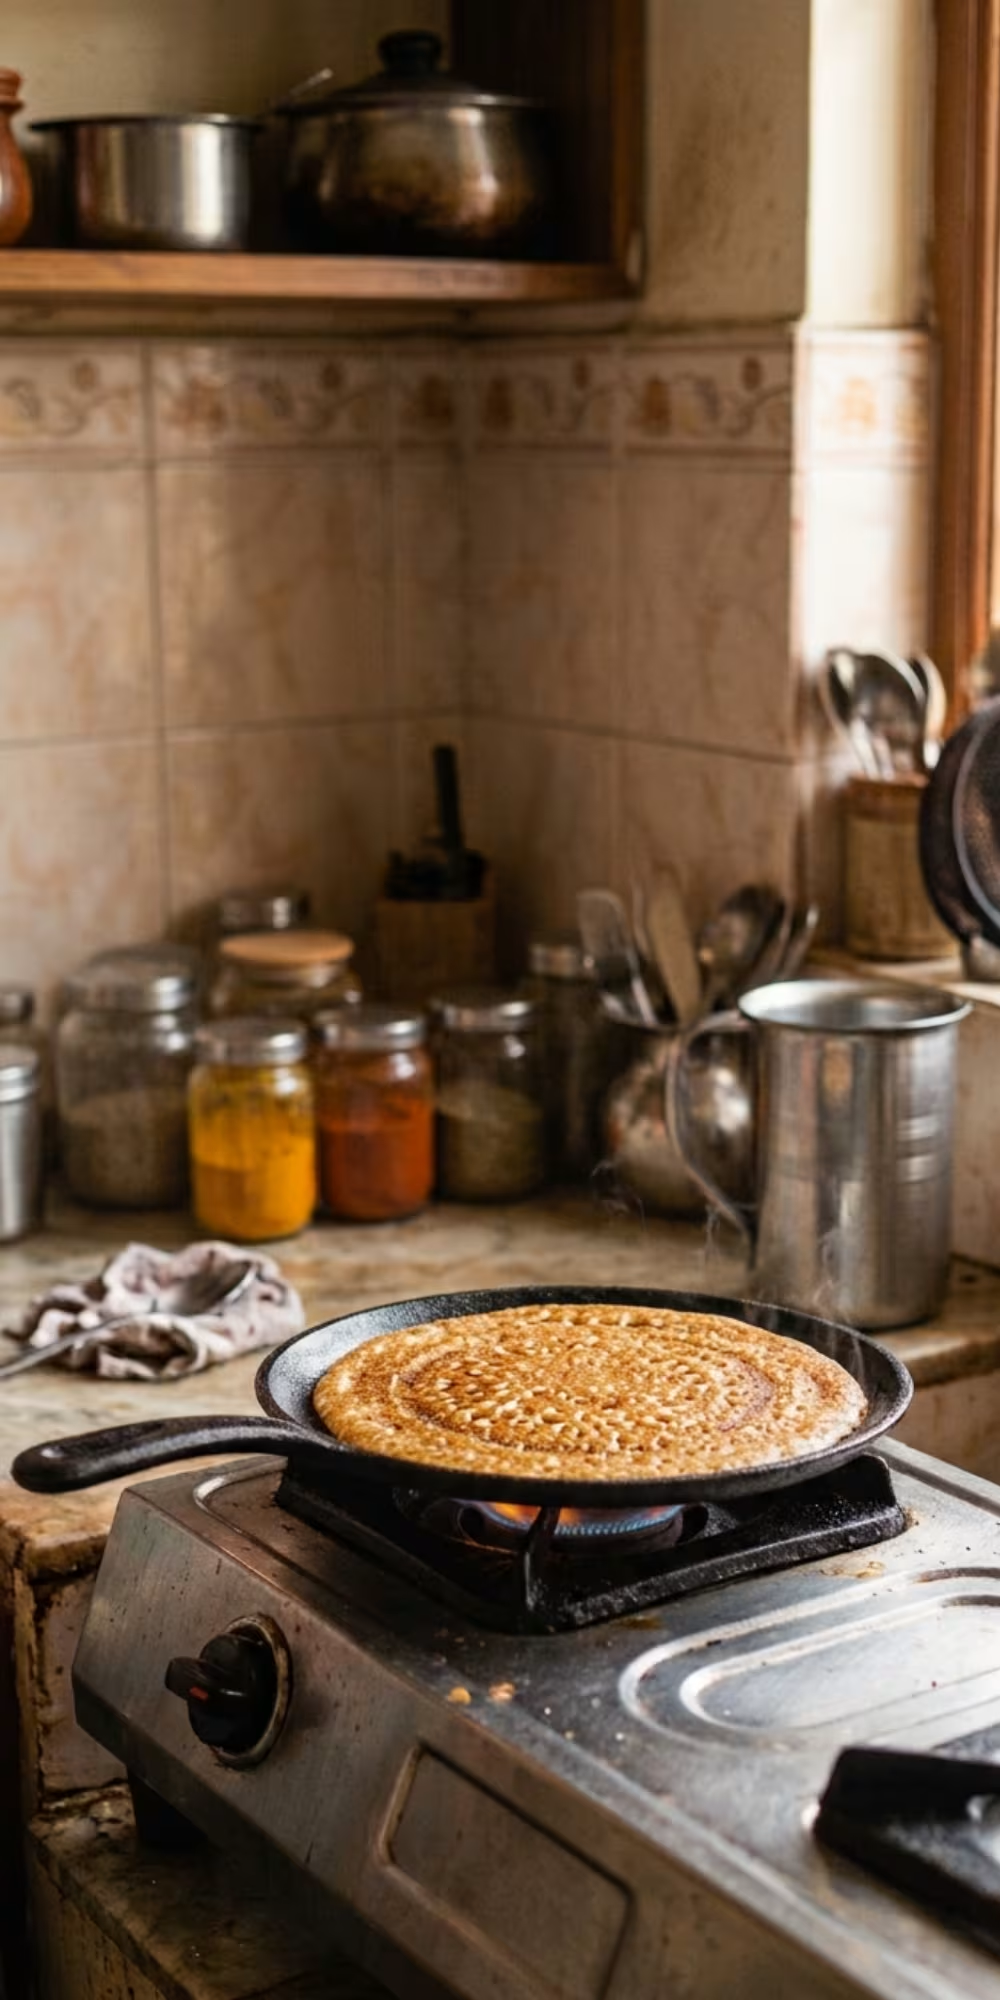
Let It Cook Undisturbed
Allow the dosa to cook without moving it. As the moisture inside dries out, the bottom will gradually become crispy and golden. This may take about 2-3 minutes depending on the batter, pan, heat and thickness.
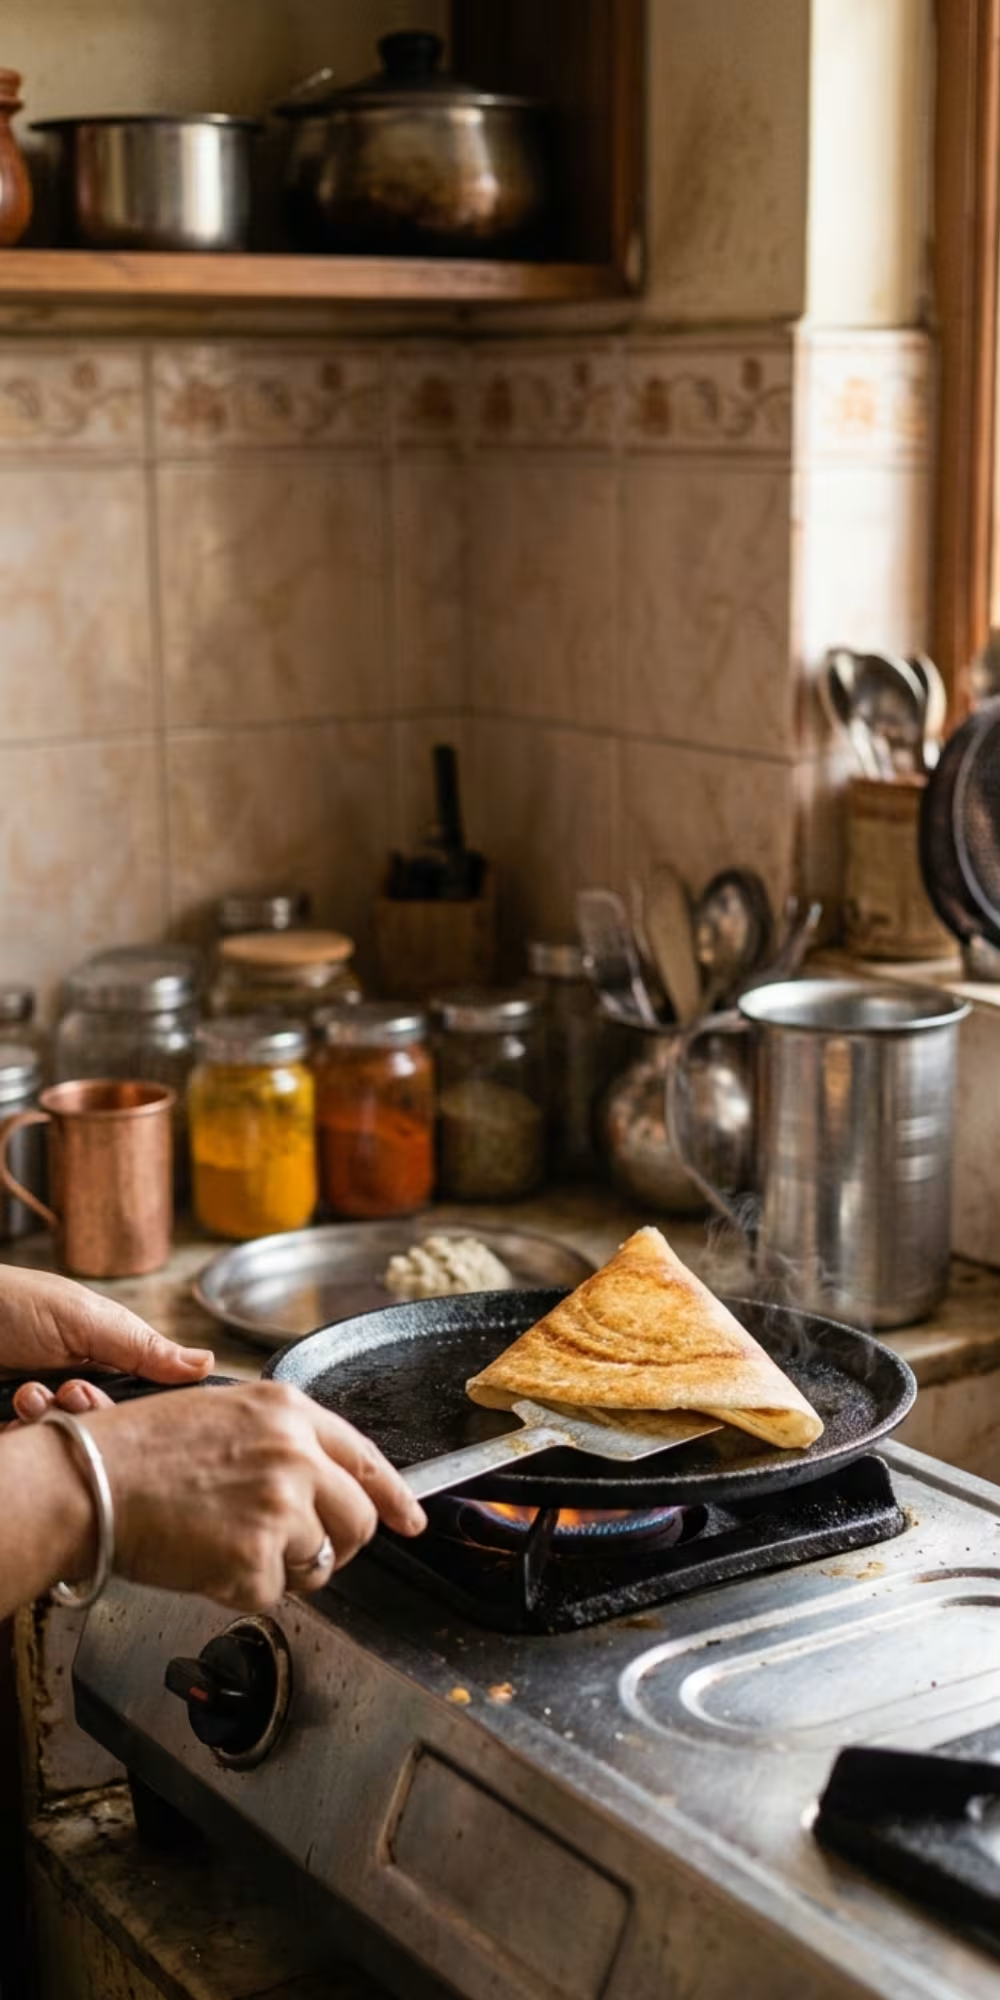
Fold and Serve Immediately
When the bottom of the dosa is crispy and golden, use a spatula to loosen the edges and fold them in if necessary. Serve immediately while the top is still crispy, ideally with sambar and coconut chutney.
How Hot Should the Dosa Tawa Be?
Temperature control is one of the trickiest parts of making dosa at home. You want the surface hot enough to cook the batter immediately, but not so hot that the batter sets before you can spread it.
How to Spread Dosa Without Tearing It
The spreading motion is one of the skills that becomes easier with practice. Don’t press aggressively into the batter. Instead, let the back of the ladle glide over the surface while gradually moving from the center toward the edges.
- Pour the batter into the center of the heated tawa.
- Place the rounded back of the ladle gently against the batter.
- Move outward in a widening circular motion.
- Use light, consistent pressure instead of pressing down hard.
- Stop once the dosa is thin and evenly spread.
The Restaurant-Style Finish
A good crispy dosa will have a thin and golden-brown base, with slightly crispy edges and light enough to fold. Once you find the right balance between batter thickness, pan temperature, batter spreading speed, and cooking time, you can repeat this process more consistently from one dosa to the next.
How Thin Should You Spread Dosa?
To make restaurant-style crispy dosa, spread the batter very thinly and evenly, leaving the center almost transparent. But make sure that the dosa can be lifted from the pan without tearing.
A common mistake is pouring too much batter into the middle of the pan. Even with a well-made dosa batter, a thick layer will cook into a soft pancake, which is not the light, crispy dosa you want.
That’s why I say start with a medium amount of batter and spread it quickly in a circular motion. There’s no need to press the sleeve hard on the pan. Light, controlled pressure is usually enough to spread the batter across the pan without rubbing or tearing the half-cooked dosa.
Soft & Heavy
Too much batter creates a thicker center and makes it harder to develop a crisp base.
Thin & Even
A thin, even layer gives you a crisp surface while keeping the dosa strong enough to fold.
Fragile & Uneven
Spreading too aggressively can create holes or weak spots that tear when you lift the dosa.
The Easy Way to Spread Dosa Batter
- Start in the center. Pour the batter onto the hot tawa and immediately begin spreading while it is still fluid.
- Use gentle circular movements. Move the back of the ladle outward in widening circles rather than pushing the batter aggressively in one direction.
- Work quickly but don’t rush. The tawa should be hot enough for the dosa to begin cooking, but not so hot that the batter sets before you can spread it.
- Stop when the layer is even. Once the dosa is thin and evenly distributed, stop spreading. Repeatedly going over the same area can create weak spots and tear the dosa.
- Let the dosa cook undisturbed. Once you’ve finished spreading, give the bottom time to brown and crisp before trying to lift it.
If the batter refuses to spread and immediately sticks to the ladle, your tawa may be too hot. Move it off the heat for a few seconds or reduce the flame, then try again. If the batter spreads very slowly and leaves a thick layer, the tawa may not be hot enough.
Why Your Dosa May Tear While Spreading
If the dosa tears as you spread it, don’t automatically assume that you need to add more water. The problem can also be an overheated tawa, batter that is too thin, or excessive pressure from the ladle.
For your next dosa, briefly lower the heat, check the batter consistency, and use lighter pressure while spreading. With practice, you’ll learn to recognize the right consistency by how easily the batter moves across the tawa.
How to Get Golden, Lacy Edges on Dosa
What’s the most appealing part of a crispy restaurant-style dosa? Its thin, golden edges are the best sign of a perfect dosa. They should be delicate and slightly mesh-like, not thick or sticky. Achieving this texture requires a combination of factors like the thickness of the batter, the temperature of the pan, the spreading technique, and sufficient cooking time.
Spread the batter so thinly that there is only a very light layer along the edges. As it cooks, its moisture evaporates and the exposed surface becomes crispy and golden. If the batter is too thick or the pan is too cold, it becomes much more difficult to create such a delicate edge.
4 Steps for Thin, Crisp Dosa Edges
Start With the Right Batter
Your fermented dosa batter should be smooth enough to spread but not watery. If it is extremely thick, the dosa will remain heavy instead of becoming thin and crisp.
Heat the Tawa Properly
Preheat the tawa before adding batter. If the surface is too cool, the batter can become difficult to spread and may cook without developing a crisp base.
Spread From the Center
Pour the batter into the center and use the back of the ladle to move outward in quick, gentle circular motions. The thinner you spread it, the more delicate the finished edges will be.
Let It Cook Undisturbed
Once the dosa is spread, resist the temptation to move it around. Give the moisture time to evaporate and the underside time to develop a golden, crisp texture.
What Your Dosa Is Telling You
| What you see | What may be happening | What to try |
|---|---|---|
| Edges stay pale and soft | The tawa may not be hot enough or the dosa needs more cooking time. | Preheat the tawa more thoroughly and allow the dosa to cook longer. |
| Batter won’t spread easily | The tawa may be too hot, or the batter may be too thick. | Lower the heat briefly and check the batter consistency. |
| Dosa becomes thick in the center | Not enough spreading pressure or the batter was poured in too large an amount. | Use a slightly smaller ladleful and spread outward more evenly. |
| Dosa tears while spreading | The batter may be too thin, or the surface may be unsuitable for spreading. | Check the batter consistency and make sure the tawa is properly seasoned if using cast iron. |
| Edges brown before the center cooks | The dosa may be spread unevenly or the heat may be too high. | Spread more evenly and adjust the flame slightly. |
💡 A Simple Trick for Better Edges
Don’t pour oil directly into the middle of a freshly spread dosa. Instead, drizzle a small amount around the edges and, if needed, lightly across the surface. This helps the perimeter crisp without making the center greasy.
Why the Pan Actually Matters
Cast iron isn’t traditional. It’s dense and thick. That means it absorbs and holds heat. It doesn’t lose heat the second the batter hits it. That steady heat lets the batter spread thin without tearing. It also crisps the base evenly. No patches of batter.
Cast iron also becomes naturally non-stick when it’s seasoned. You don’t need a chemical coating that breaks down over time. This is important if you make dosa often.
If you love dosa and want a pan made for it, a solid cast iron dosa tawa is worth the upgrade. This kind of tawa works well for both home kitchens and semi-commercial ones. One good cast iron tawa, properly seasoned, will last longer than non-stick pans.
Tips for Best Results
- Always heat the pan fully before the dosa. The first one is usually a test dosa.
- Use a fermented batter. A fermented batter won’t crisp, no matter how good the pan is.
- Wipe the tawa with a light coat of oil between dosas rather than putting oil in the center.
- Season a cast iron tawa with oil and heat before first use. After that, don’t use soap. Just wipe it clean and re-oil lightly.
Common Dosa Mistakes That Make It Soft, Thick, or Sticky
Since I have been making dosa for many years, I can now make a perfect dosa, but I made a lot of mistakes the first time and learned from those mistakes. For example, remember that even a good dosa batter can give disappointing results if the temperature, consistency or spreading technique is not right. You too should check these out, and try to avoid these mystiques.
Using Batter That Hasn’t Fermented Enough
Proper fermentation affects the texture, taste, and structure of the dosa. If the batter does not change much after fermentation, the finished dosa may be dense instead of light and crisp.
Making the Batter Too Thick
It is difficult to spread a thick batter in the thin layer required for a crispy dosa. Also, it can result in a soft, bready middle instead of a soft and crispy edge.
Starting With the Wrong Tawa Temperature
Temperature is something that can be easily overlooked. A pan that is too cold can cause food to stick and cook unevenly, while a pan that is too hot can cause the batter to solidify before it’s finished spreading.
Pouring Too Much Batter
A large batch of batter makes the dosa thicker and takes longer to cook, making it much more difficult to achieve the crunchy, web-like texture of restaurant dosa.
Spreading the Batter Too Slowly
The batter starts to set almost immediately as soon as you put it on the hot pan. If you take too long to spread it, your dosa may turn out uneven or thick.
Adding Too Much Oil in the Center
There is no need to soak/swim the dosa in oil. Pouring too much oil in the middle can make the surface oily and prevent the beautiful brown color you are trying to achieve.
Trying to Flip the Dosa Too Early
A thin dosa usually needs time to develop its crisp underside. Moving it too soon can tear the dosa or prevent the base from developing an even golden-brown finish.
Ignoring the Tawa Between Dosa
The temperature of the tawa can change after every dosa, especially when you’re cooking several in a row. That can make one dosa perfect and the next one pale, sticky, or difficult to spread.
Why Is My Dosa Sticking to the Pan?
I think if your dosa sticks to the tawa instead of coming out easily, the problem is usually a combination of the pan’s condition, temperature, batter thickness, or cooking method. It doesn’t mean that your dosa batter is bad.
The most common reason: the tawa isn’t ready
A properly heated tawa is essential for making dosa. If the batter is poured onto the tawa when it is too cold, it may remain on the tawa instead of cooking properly and lifting off the tawa. On the other hand, it becomes difficult to spread the batter evenly on an overly hot tawa. The main goal is to have a well-heated tawa that helps the batter spread quickly and start cooking immediately.
The cast-iron tawa isn’t seasoned properly
A cast-iron dosa tawa generally needs a good layer of seasoning to develop a smoother cooking surface. If the surface is dry, rough, or newly seasoned, dosa may grip the pan more easily.
The pan is too cold
An underheated tawa can make the batter cling to the surface. Preheat the pan properly before adding batter, then adjust the heat if necessary so the dosa spreads without immediately setting.
The pan is too hot
If the batter starts cooking the instant it touches the tawa, it may become difficult to spread into a thin layer. Reduce the heat briefly before pouring and spreading the next dosa.
The batter is too thick
Very thick dosa batter can be difficult to spread and may produce a heavier layer that sticks more readily. Add a small amount of water and mix well if your batter needs thinning.
The tawa has too much oil
Dosa generally needs only a light coating of oil or ghee. Excess oil can make spreading difficult and interfere with the direct contact between the batter and the cooking surface.
You are trying to remove it too early
Give the dosa enough time to cook and crisp underneath. When the surface is cooked and the edges begin to release naturally, it becomes much easier to lift with a thin spatula.
How to Stop Dosa From Sticking
- Preheat the tawa thoroughly before making the dosa.
- Use a well-seasoned cast-iron surface or a suitable nonstick dosa pan.
- Keep the batter fluid enough to spread easily, but not watery.
- Use only a light coating of oil or ghee.
- Spread the batter quickly using the back of the ladle.
- Allow the dosa to cook until the underside is crisp and the edges begin to release.
- If the tawa becomes excessively hot between dosas, briefly reduce the heat before adding the next ladleful of batter.
What to Serve With Restaurant Style Dosa
Crispy dosa is already delicious, but the right accompaniments make it a complete and satisfying meal. My favourites are traditional accompaniments like sambar, coconut chutney and tomato chutney, which add different flavours and textures to the crispy dosa while keeping the taste intact.
Sambar
For a traditional South Indian breakfast, serve a bowl of vegetable sambar with hot dosa. This mildly sour and spicy dal stew goes especially well with thin and crunchy dosa, as you can dip each piece into the hot sambar just before eating.
Coconut Chutney
Creamy coconut chutney is one of the easiest accompaniments to make with dosa. Its cool, refreshing taste creates a nice contrast to the hot and crunchy edges of the dosa.
Tomato Chutney
If you want something a little more sour and strong than coconut chutney, opt for tomato chutney. It goes especially well with plain dosa.
Potato Masala
Make a simple dosa into a more nutritious meal by stuffing it with a spicy potato filling. This is the traditional method for making masala dosa.
Mint or Coriander Chutney
Fresh herb chutneys add a brightness and slightly tangy flavor to dishes, serving as a refreshing alternative to thick coconut-based side dishes.
Onion Chutney
I love onion chutney because it gives me an exotic taste in vegetarian food. I think you too will try this chutney and look for it every time you make dosa at home.
Storage & Leftover Dosa Batter
Most of the time, when I make dosa at home, I end up making more batter than I need out of impulse. But I know you’ll be happy knowing that you don’t have to use an entire batch of dosa batter in one morning. Properly stored batter can be kept in the refrigerator and used over several days, making it easy to enjoy fresh dosa whenever you need a quick breakfast or light meal.
How to Store Dosa Batter in the Refrigerator
Use a clean, food-safe container that has enough room for the batter to rise. Cover the container tightly and refrigerate the batter after it has risen. Before making the dosa, check the consistency by gently shaking the batter. If it thickens during storage, add a little water and mix until it is spreadable.
How Long Does Dosa Batter Last?
Refrigerated dosa batter is usually best used within a few days for the freshest taste and texture. The fermentation process in the refrigerator is slow, so the batter may become more sour as it ages. Always use your own judgment by observing its smell, appearance, and storage condition.
Can You Freeze Dosa Batter?
Yes, dosa batter can be stored in the refrigerator. If you have more batter than you will use in a few days, divide it into the required portions and store it in an airtight, freezer-safe container. Leave some space at the top of the container, as the batter may expand as it freezes.
How to Thaw Frozen Dosa Batter
Keep the frozen batter in the refrigerator and let it thaw slowly. Once thawed, stir it gently before cooking and let it cool down a bit. Check the consistency before making the dosa and add a little water if needed.
Best Way to Store Leftover Dosa Batter
- Let the batter complete its fermentation before long-term storage.
- Transfer unused batter to a clean, covered container.
- Refrigerate the portion you plan to use within the next few days.
- If freezing, divide the batter into smaller portions so you only thaw what you need.
- After thawing, stir gently and adjust the consistency with a little water if needed.
- Always check the batter before cooking. If it has an unusual smell, visible mold, or other signs of spoilage, discard it.
| Storage Method | Best Use | What to Remember |
|---|---|---|
| Refrigerator | Use over the next few days | Fermentation slows but does not necessarily stop completely. |
| Freezer | Longer-term storage | Freeze in practical portions and thaw gradually. |
| Room temperature | Short fermentation period only | Don’t leave fully fermented batter sitting out unnecessarily. |
When Should You Throw Away Dosa Batter?
Don’t rely solely on how old the batter was made. If you notice visible mold, an unusual or unpleasant odor, unexpected discoloration, or any other obvious signs of spoilage, it’s safe to throw away the batter without trying to save it.
Frequently Asked Questions About Crispy Dosa Recipe
What rice is best for dosa batter?
Idli rice or parboiled rice is a good choice for dosa batter because it helps produce a dosa that spreads easily and develops a crisp texture when cooked properly. The exact rice can vary by region and recipe, so consistency and fermentation are just as important as the type of rice.
Why is my dosa sticking to the pan?
Dosa can stick when the tawa temperature, seasoning, or batter consistency is not right. A cast-iron tawa may also need better seasoning. Preheat the pan properly, use a well-fermented batter, and avoid using too much oil in the center of the pan.
Can I make dosa on a nonstick pan?
Yes. You can make dosa on a nonstick pan, especially if you want an easier-to-maintain cooking surface. A well-seasoned cast-iron tawa can retain heat more effectively, which can be useful when making several crisp dosa in a row, but the pan is only one part of the process.
How long should dosa batter ferment?
Dosa batter commonly needs around 8 to 12 hours of fermentation, although the exact time depends on room temperature and other conditions. Look for a slight increase in volume and small bubbles in the batter rather than relying only on the clock.
How do I know when dosa batter is properly fermented?
Properly fermented dosa batter should usually have small bubbles, a slightly expanded appearance, and a pleasantly fermented aroma. It should remain pourable and spreadable. If the batter smells unusually strong or has fermented far beyond the desired point, it may be over-fermented.
Do I need to season a cast-iron dosa tawa?
Yes. A well-seasoned cast-iron tawa generally performs better for dosa than bare cast iron. Before using a new tawa, follow the manufacturer’s seasoning instructions. With regular use, maintaining a thin protective layer of oil can help keep the cooking surface smoother.
Why is my dosa soft instead of crispy?
Soft dosa can result from thick batter, insufficient fermentation, too much moisture, incorrect pan temperature, or spreading the batter too thickly. For a crispier dosa, use properly fermented batter, preheat the tawa, spread the batter thinly, and allow the dosa to cook until the underside is golden and crisp.
Can I freeze leftover dosa batter?
Yes, dosa batter can be frozen for later use. Store it in a suitable airtight, freezer-safe container and leave enough room for expansion. Thaw it in the refrigerator, then bring it back to a usable consistency before cooking. Because fermentation and texture can change during freezing, the results may not be exactly the same as freshly fermented batter.
Why do restaurant dosas taste and feel different from homemade dosa?
Restaurant dosa can differ because of several factors, including batter formulation, fermentation, tawa temperature, spreading technique, cooking time, and the type of equipment used. Commercial kitchens also make dosa repeatedly on large cooking surfaces, so cooks develop precise control over heat and batter consistency.
How do I make dosa crispy and golden at home?
Start with properly fermented dosa batter and a thoroughly heated tawa. Spread a small amount of batter into a thin, even circle, then drizzle a little oil or ghee around the edges. Let the dosa cook undisturbed until the bottom becomes golden and crisp before folding and serving immediately.
If you like this article about the Crispy Dosa Recipe, please share this with your friends on Facebook and Pinterest. Also, subscribe to my blog to get all the latest content first on your mobile.